

Dermaplaning
Last month I got my first legit dermaplane! I had heard great things but holy cow is it a game changer!! In the days that followed I had to wear less and less makeup because my skin tone was the best it’s been in a very long time. I was literally glowing. I thought that by using the Tinkle razors that I was doing a true dermaplane, but actually it’s only getting the peach fuzz off and the top layer of skin. Don’t get me wrong, the Tinkle Razors are great to use in between a professional dermaplane. But I will forever be a fan of a professional dermaplane! What are some benefits of dermaplaning besides the ones I just talked about?
- Provides deeper product penetration.
- Removes soft facial hair that traps dirt and oils.
- Promotes smoother skin.
- Safe procedure for removing dead skin cells and “peachfuzz”
- Reduces the appearance of acne scars.
- Diminishes the look of fine lines.
- Works on all skin types
This might just be a monthly procedure for me! At least until the wedding! 🙂
5 Tricks to Keep Your Skin Glowing this Winter
We all know winter weather (snow, wind, sub zero wind chills) can do a number on our skin. But there is hope to keeping your skin glowing throughout this winter!
- Hydrate! Hydrate! Hydrate! Buy a new water bottle with a straw if it will get you drinking more water! Make water more fun by adding fruits like lemon, strawberries, kiwi, oranges, limes, etc. The more hydrated you are, the more your skin will glow!
- Exfoliate at least 2-3 times a week. Get all the dead, dry skin off by exfoliating. This Mario Badescu is my favorite and the price is right!
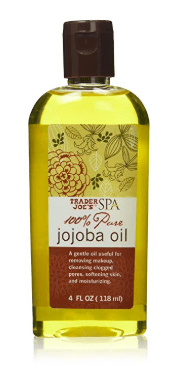
- This may seem obvious, but moisturize. You can also play around with facial oils! Trust, me your skin won’t look oily, just glowy! Try it before bed and let it soak in all that oily goodness! Trader Joe’s Jojoa oil is one of my favorites! It has so many uses! Including taking off your make up! And it’s only $7! Perfect to play around with! If you don’t mind spending a little more- spring for a Vitamin C oil! They can be pricey but are SO worth it!
- Sunscreen is important in winter too! Be sure you are buying make up with at least some SPF. Especially if you are outside a lot, or even, you know…driving in your car during the day?!
- Eat carrots! They are a great source of vitamin C which helps your body produce collagen (a protein that helps your skin keep its elasticity). They are also high in Vitamin A. Vitamin A is an antioxidant that attacks cells damaging free radicals. Which in turn, prevents wrinkles and fine lines.

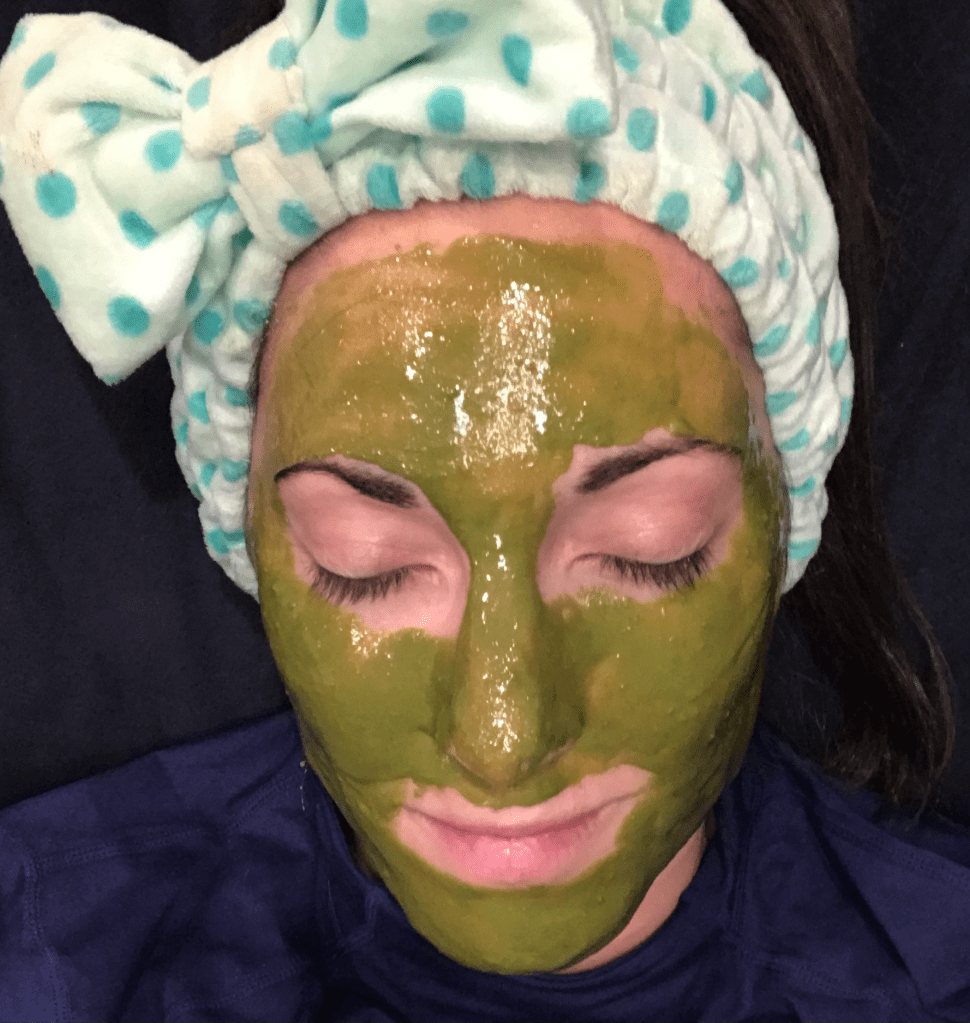
Merry Christmas from Lake Lemon, where the’s a light dusting of snow, a frozen lake, a cozy fire and A Christmas Story playing on repeat. (Yes I’m one of those mega-fans. This movie gets quoted at least once any time I’m hanging out with my cousin Laura.) Fun fact- did you know that grown-up Ralphie played the head elf in Elf?!

Anyway, I have been busy testing out some fun holiday masks! First up, “Un-Grinched”. If you were thinking that avocado was used in the making of this mask, think again! Can you guess what I used?! Just two ingredients- water & matcha!
Mask #1: Not So Grinchy
Why matcha? Matcha is considered a superfood and has a plethora of benefits for our gut health, but did you know that what you eat can determine the healthiness of your skin?! Gut health and skin health go hand in hand. So it makes sense that because matcha is full of antioxidants for your gut, it must be good for skin too. After doing this mask, my skin was soft and glowing.
While this superfood has most recently become a staple of Starbucks and other coffee shops, I thought it would make an interesting mask and after some research, I found I was not alone in the matcha homemade mask idea. Many people made this mask with honey, and even yogurt. I simply mixed it with a couple teaspoons of water. I used the matcha powder from Trader Joe’s which does have a little sugar (which worked as light exfoliant). I left it on for about 10-15 minutes. But the second I started to feel it dry I rinsed it off. The results were awesome!

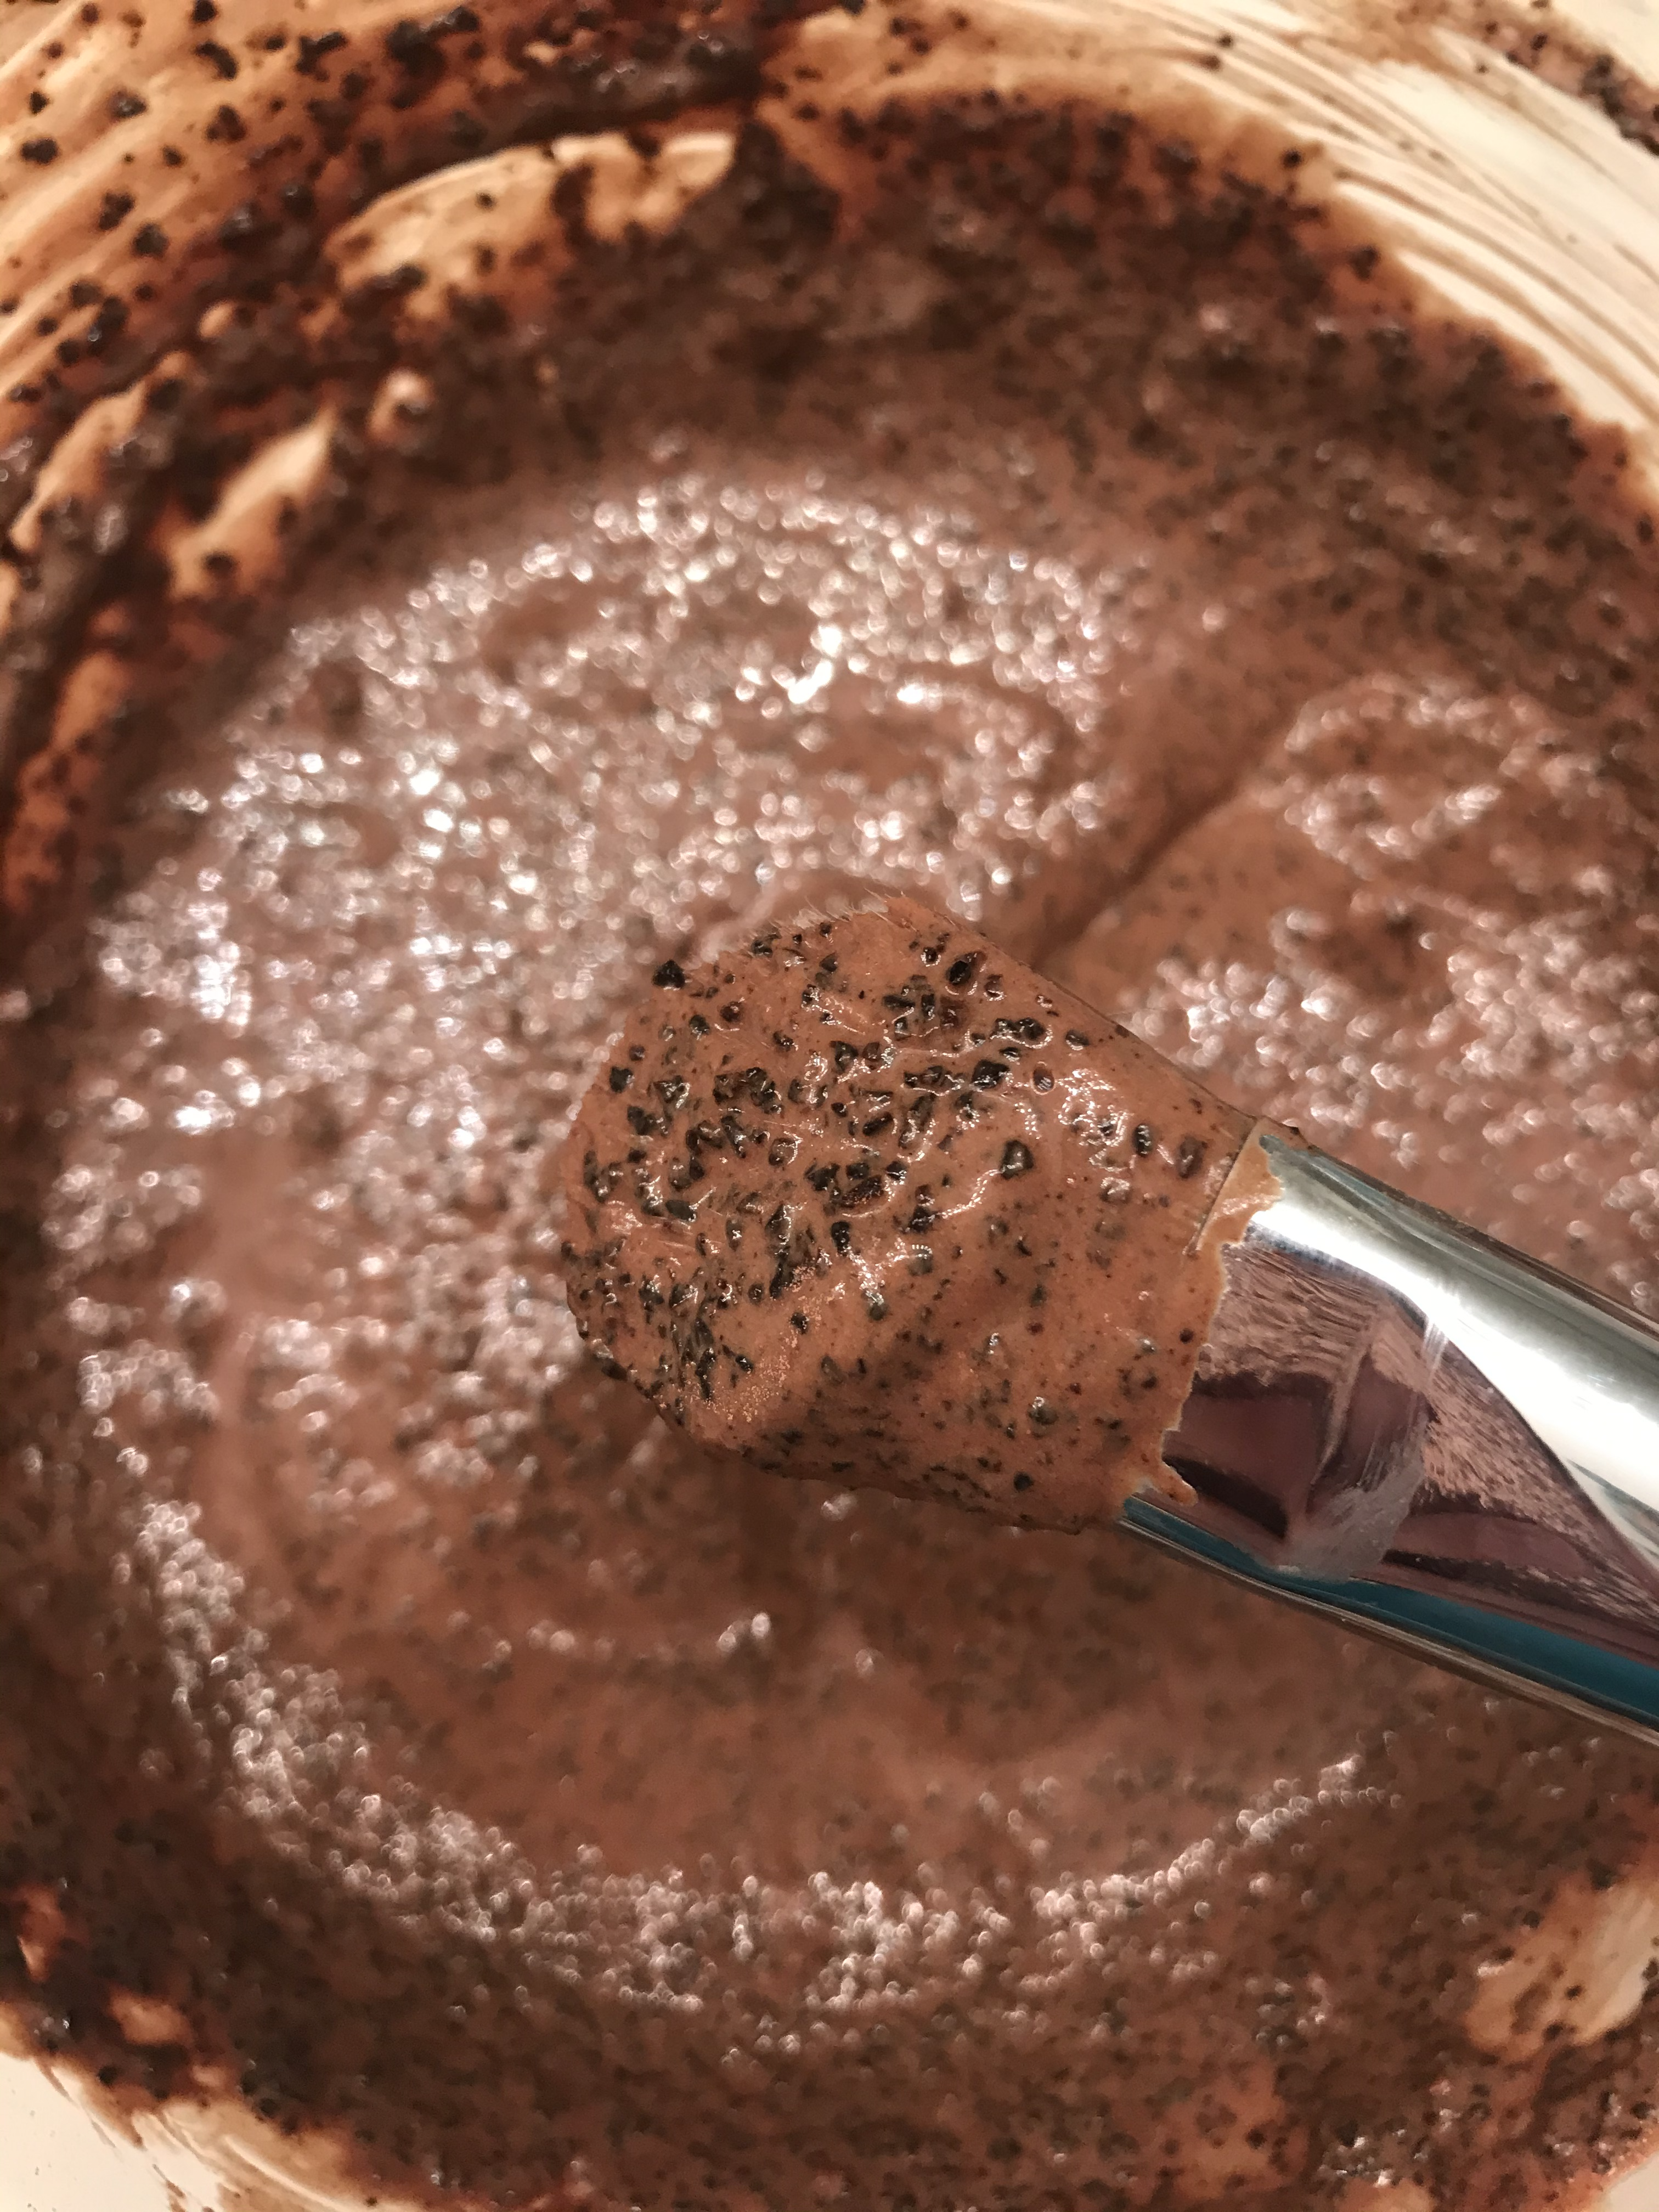
Mask # 2: Mocha Mask
This mask is made from ingredients that you can find all around your kitchen! So easy and energizing for your skin. I will warn, this mask is a little messy, be sure you wear an old sweatshirt in case you get some of the mask on your clothes.
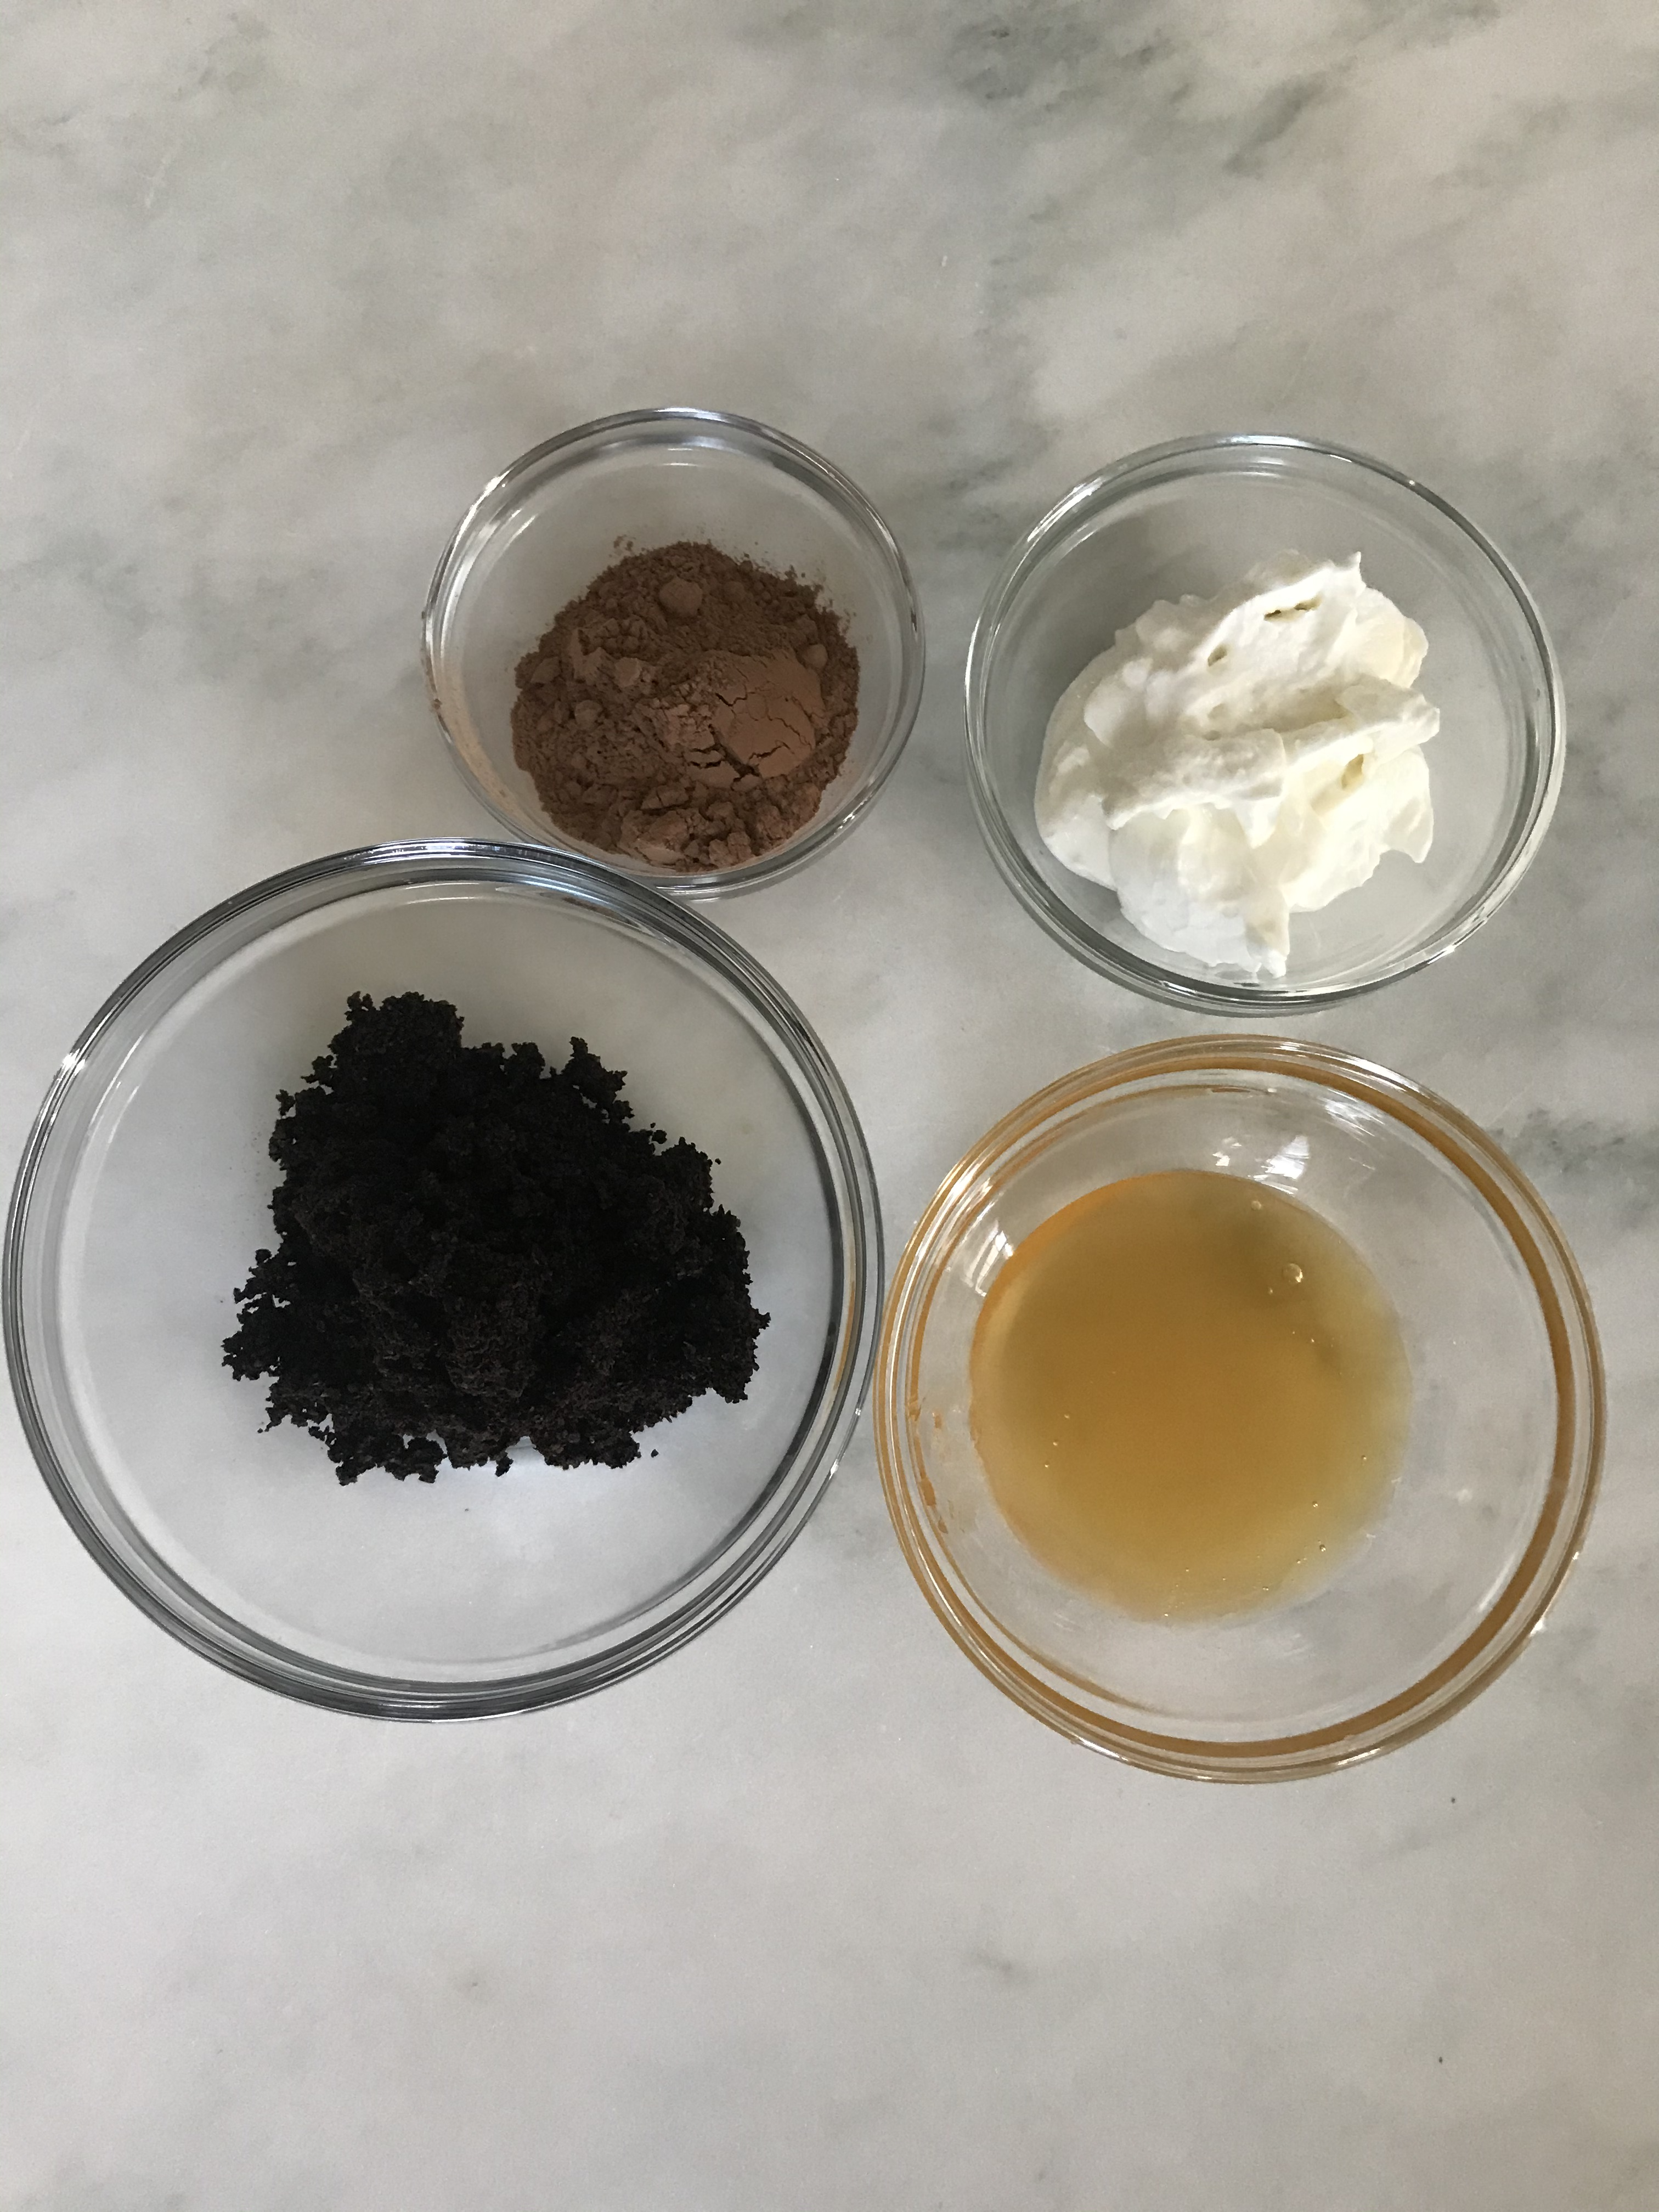
You will need:
- 1/4 cup coffee grounds finely ground (I used used coffee grounds, but you could use fresh as well.)
- 1 tablespoon of honey
- 2 heaping tablespoons of greek yogurt
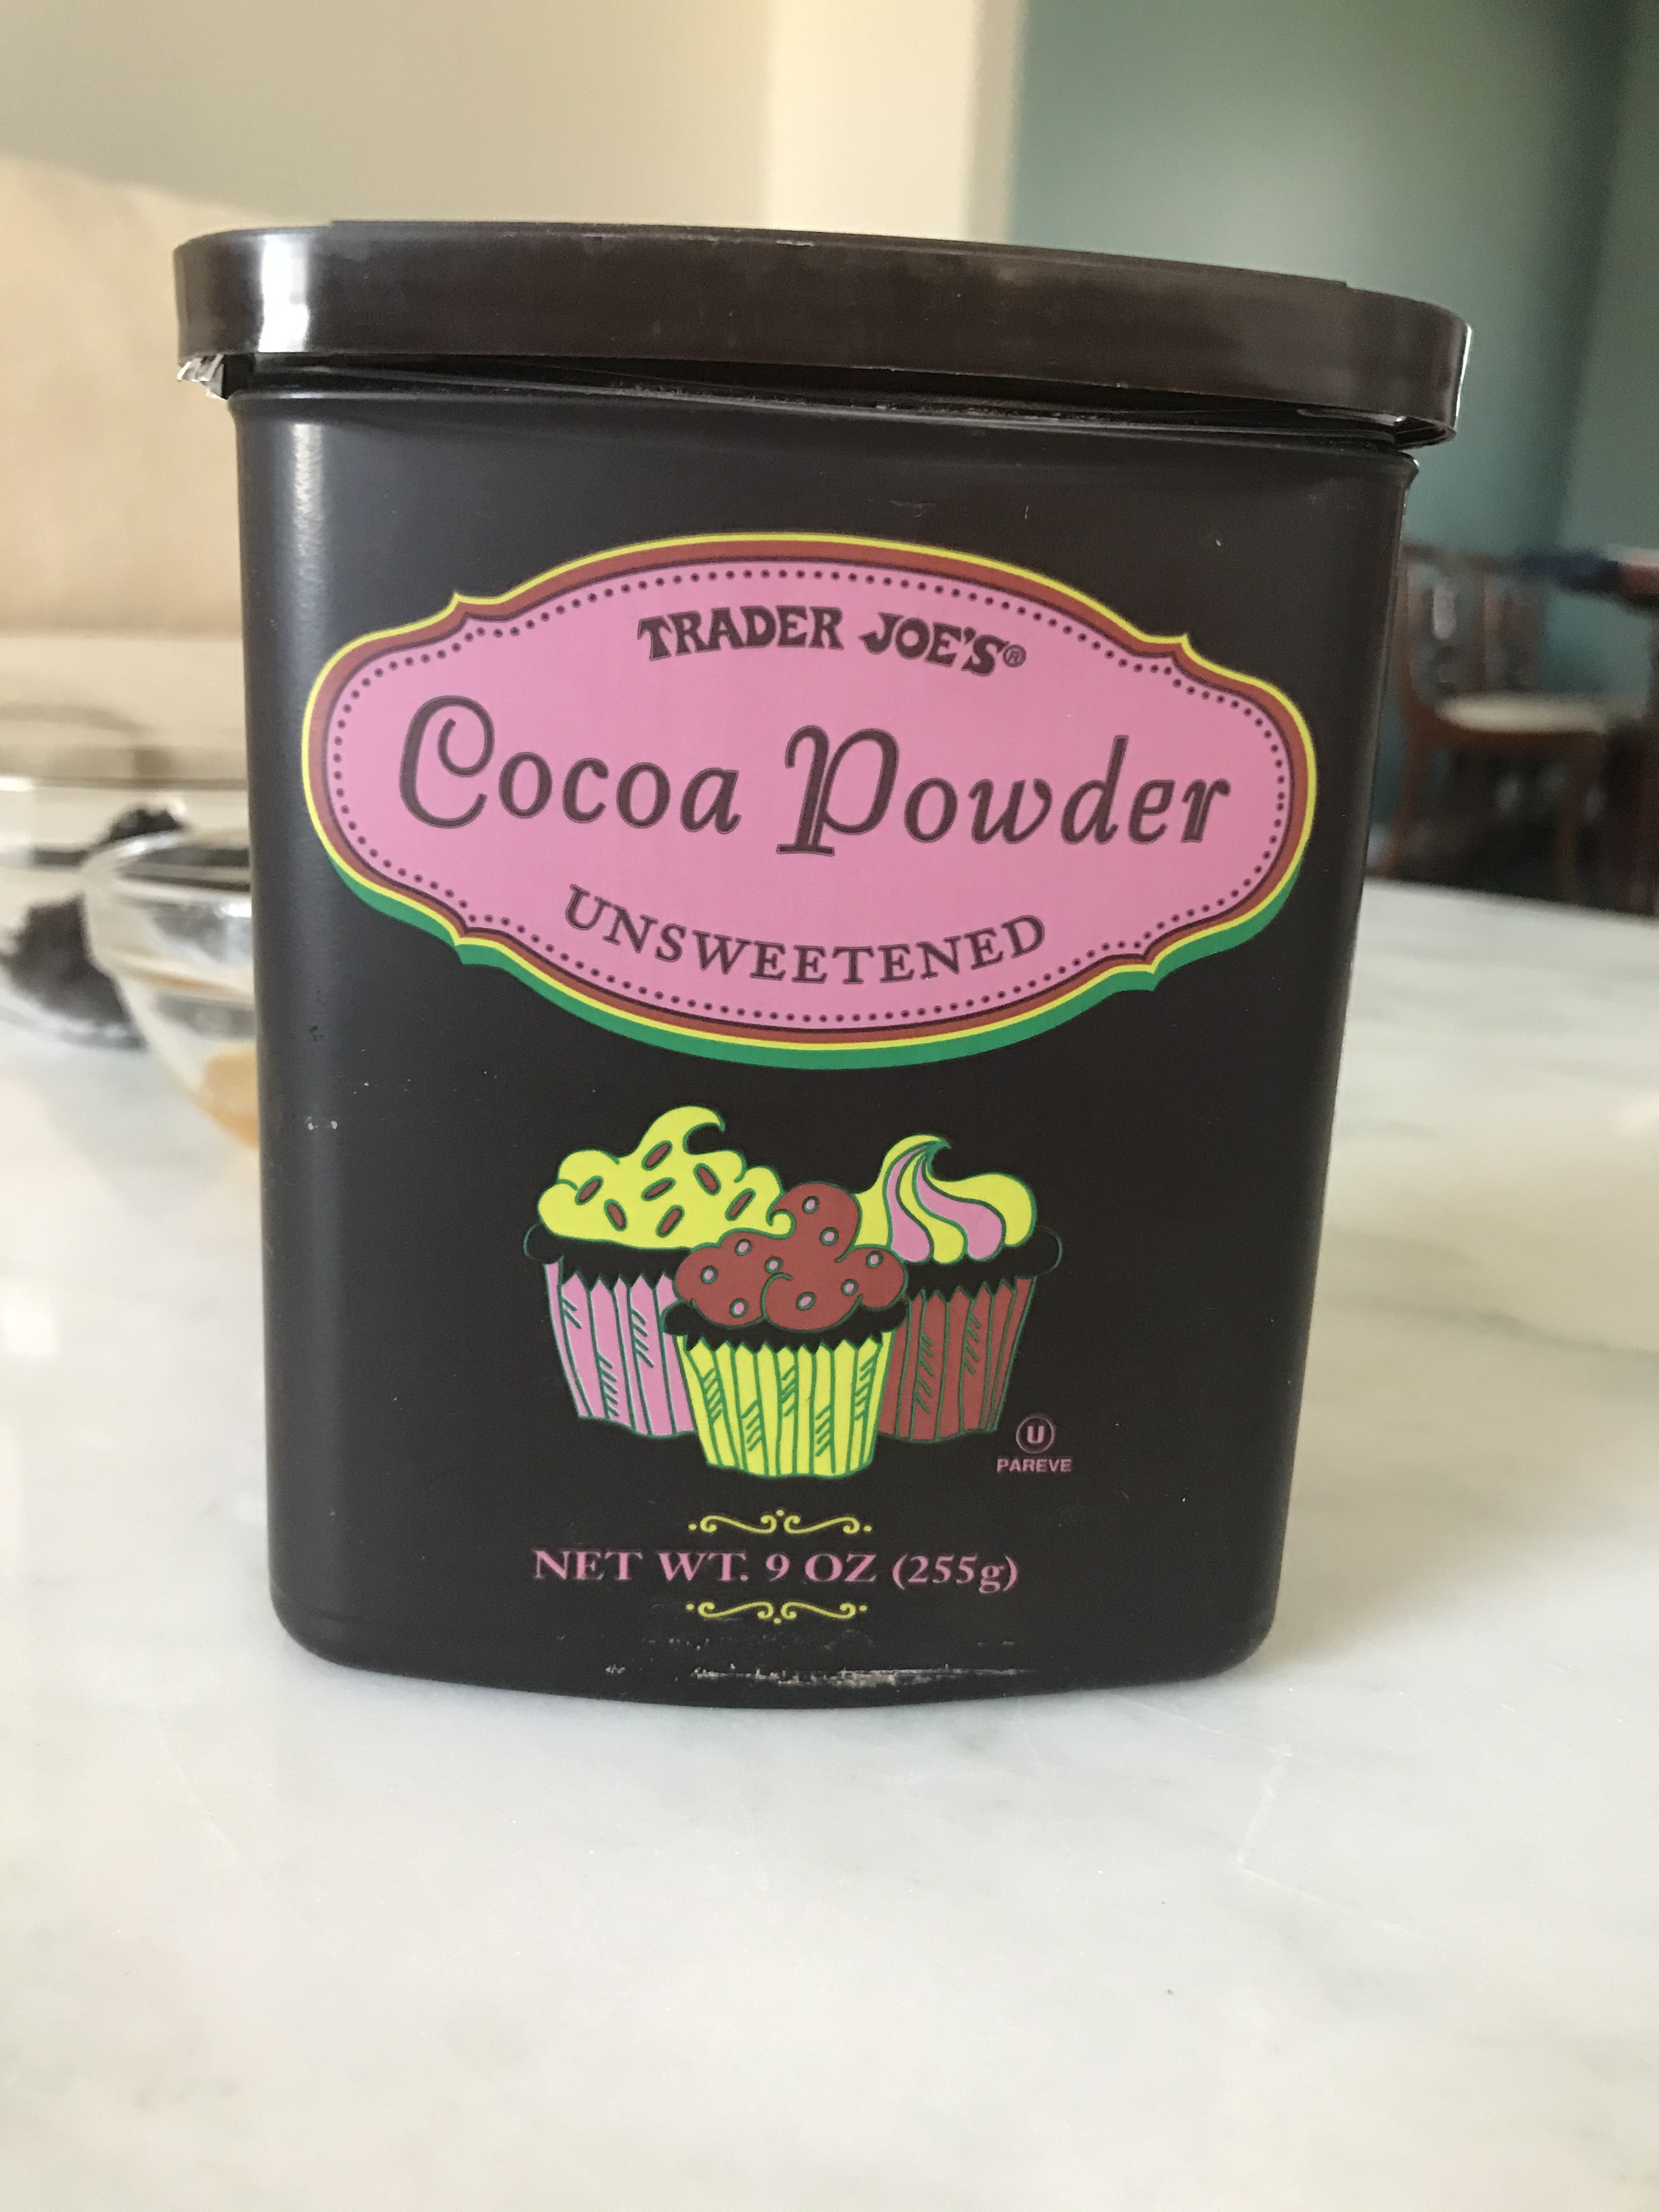
- cocoa powder (check the label to make sure it is pure cocoa powder, NOT hot chocolate mix. I used Trader Joe’s.
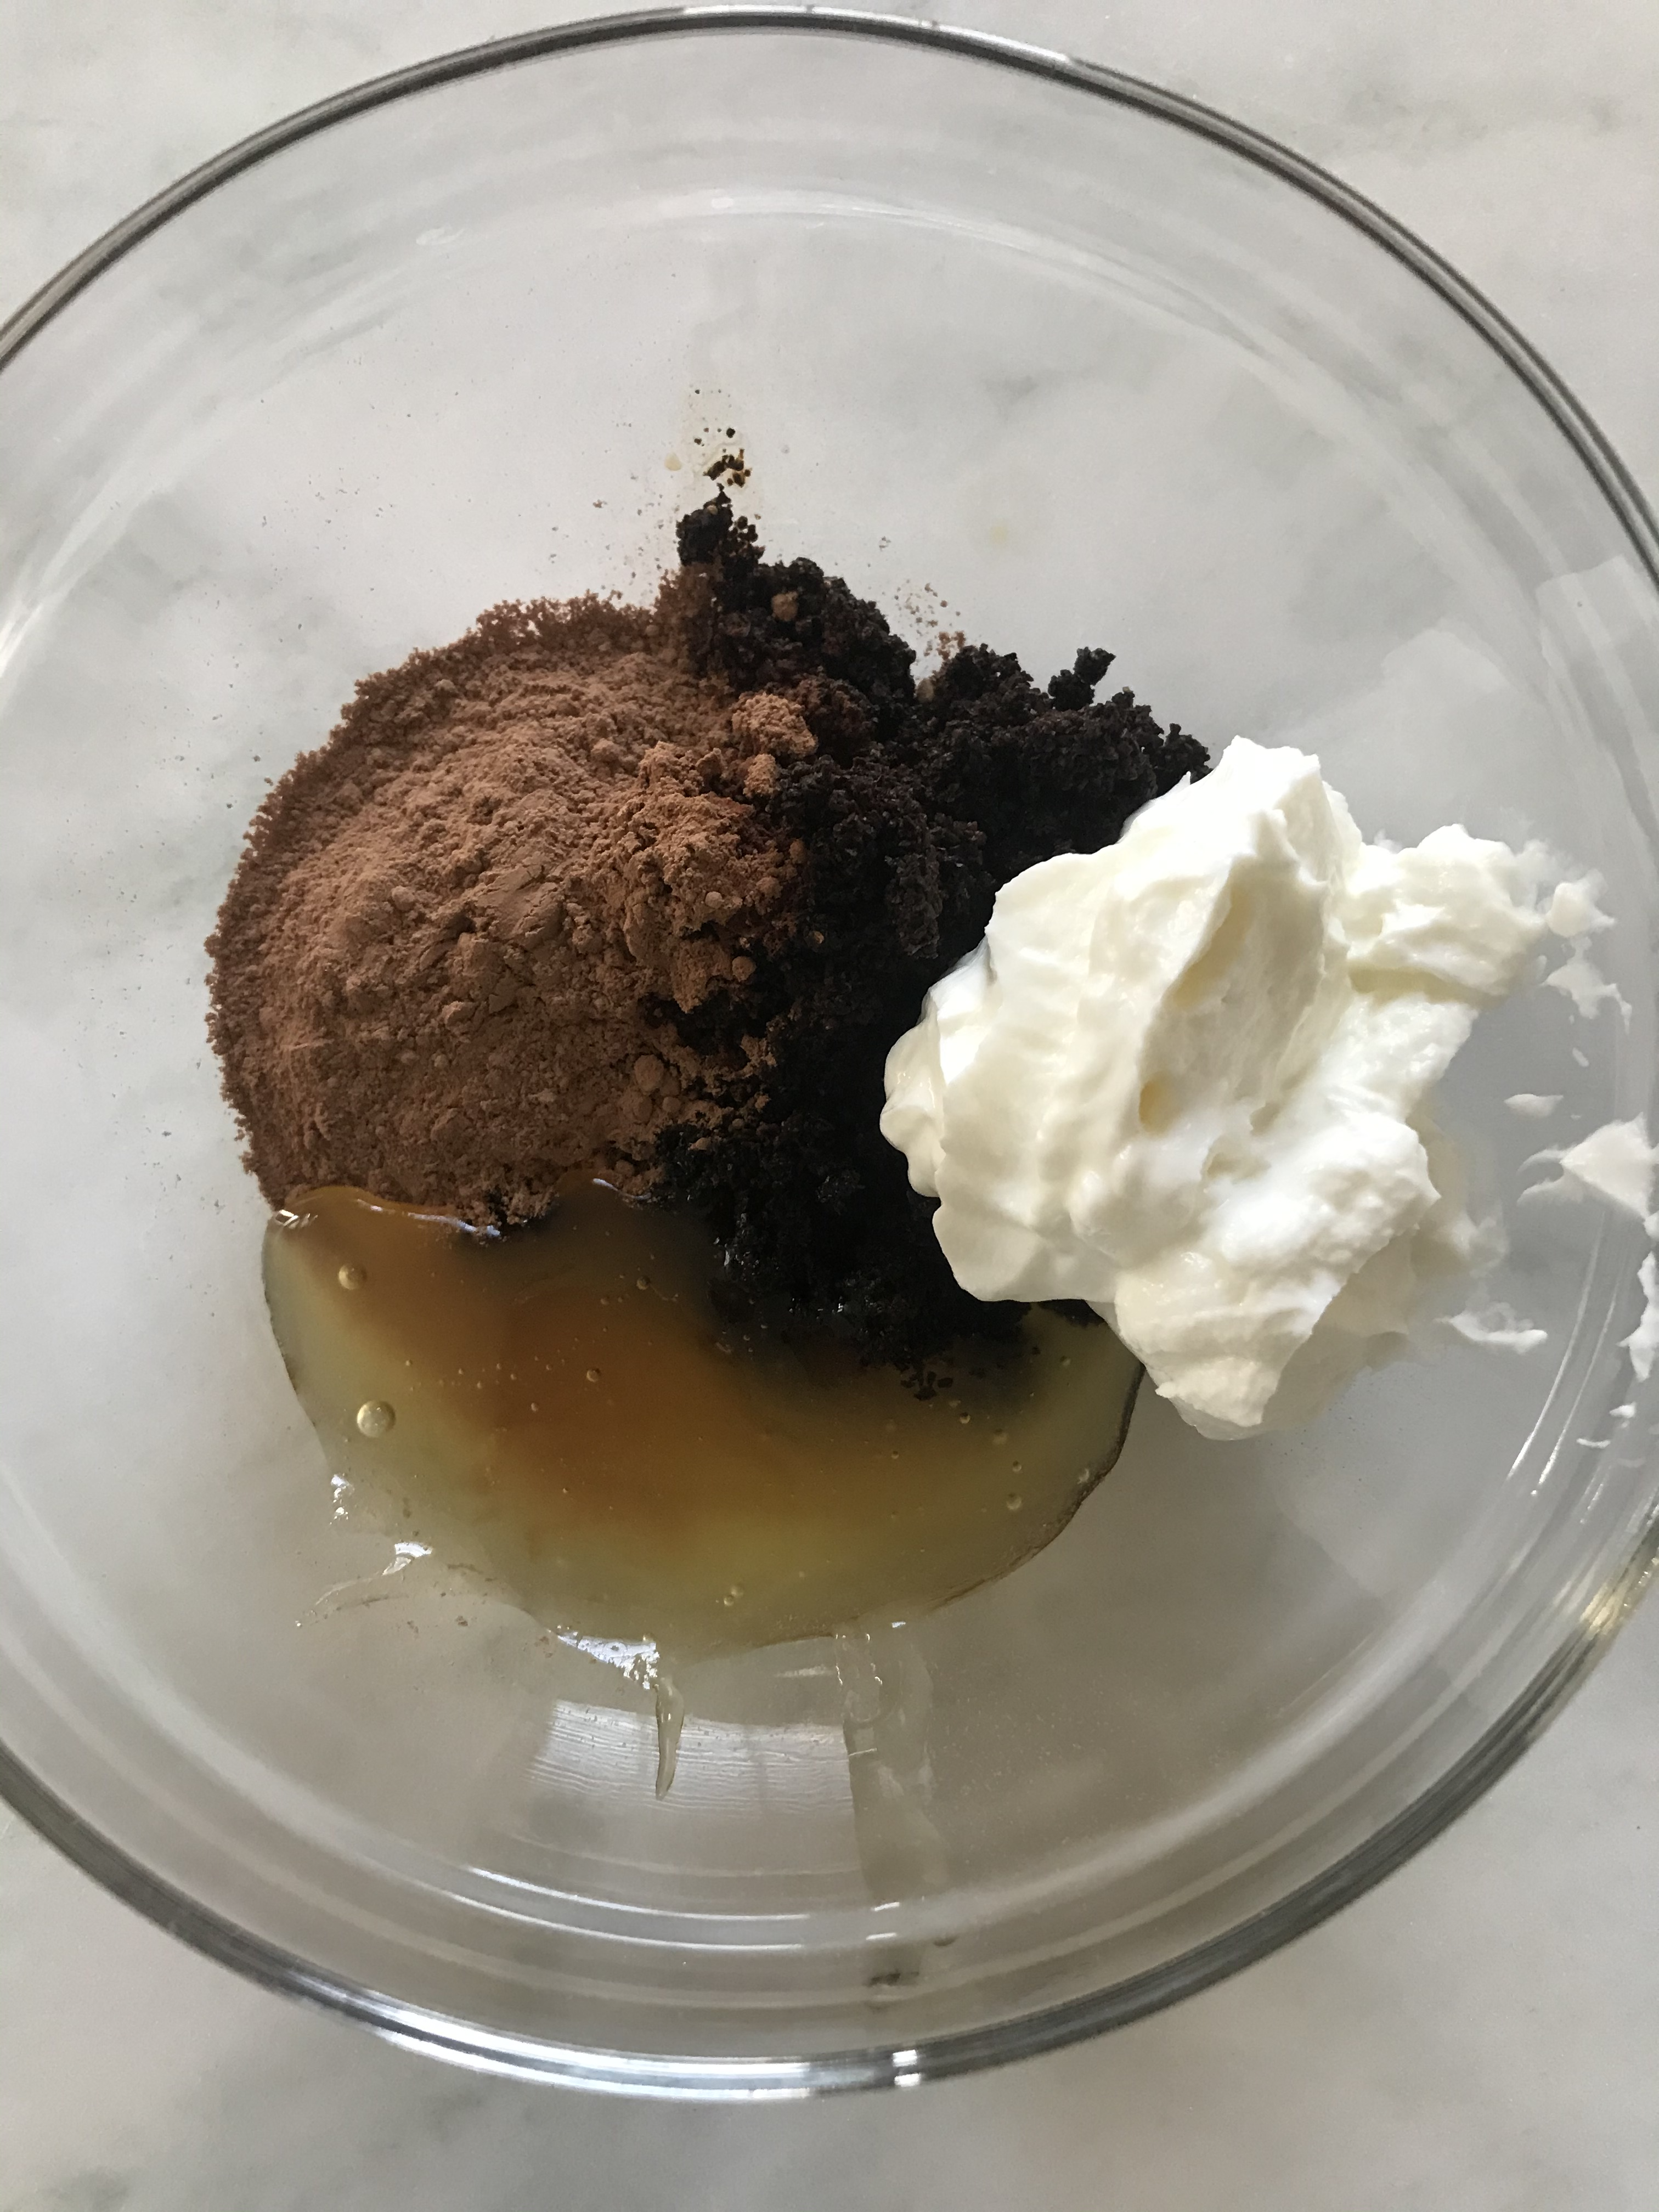
First, mix all ingredients together in a bowl until well combined. Then, apply the mask to clean skin (I highly recommend using a make up brush or masking applicator.) If you want, VERY VERY GENTLY rub the mask in a circular motion to exfoliate your skin. If you have sensitive skin, you might want to skip this step.
Then, let sit for 10-15 minutes OR until you notice it beginning to dry. When time comes to remove, I would recommend using damp paper towel to remove the coffee grounds and throw away. DO NOT put them down your sink. Then, you can rinse the rest of the mask with warm water. I like to end with a splash a freezing cold water. Trust me, it feels SO good!
I forgot to take a post- mask picture for this one, but my skin looked very bright and was soft! It was a winner in my book!

Mask #3: Merry and Bright
Next up is another superfood mask made with turmeric! Why turmeric?? Turmeric super high in antioxidants, can help fight inflammation (in the gut, but if then, why not on our skin?), and more! Click here to read more fascinating facts about turmeric! This article will make you want to run out and buy some turmeric or at least start cooking with it! Here, we will use it to make a mask that will make our skin glow!
You will need:
- 1 tsp of turmeric
- 1 tsp of greek yogurt
- 1tsp honey
- an old towel that you can remove the mask with or just jump in the shower when you are finished!
First, mix all ingredients together into a clean bowl. Then apply with your fingers or a makeup/masking brush.
Leave on for 20 minutes while you relax.
Remove with warm water (and a splash of cold if you like)! You may notice there is still some yellow on your skin. If this is the case just remove with a little bit of olive oil on a cotton ball or cotton pad.
Pictures coming soon!
Mask #4: Cinnamon Detox Mask
Coming soon!
Quarantine Pedi
Let’s be honest, this quarantine is taking a tole on our hair, nails, skin, etc. The memes just keep coming and what makes them so funny is that they are true! Literally last night while I was catching up on West World my feet literally sounded like sandpaper under my blanket! My little ped-egg contraption had not been working the way I needed it to. I decided to get a little craftier and put together the world’s most simple foot/hand scrub. I have made these before, but have always used EVOO (extra virgin olive oil). After doing a little more research I thought it might be even better to use avocado oil. I bought this oil with the purpose of cooking with it. I have maybe used it once… The thing is, avocado oil has many of the same benefits as avocado! Most importantly in this case, high amounts of vitamin E. If you don’t have avocado oil hanging around just use EVOO! It works great too!
- 1/2 cup Oil- avocado, EVOO, fractionated coconut oil, or jojoba oil
- 1/2 cup Sugar (cane sugar would probably work best because it has slightly larger grains, but I just used granulated sugar and it still worked great!
- 1/2 cup epsom salt (if you don’t have this around I would use kosher salt, if you just have regular salt just use that! There are no real rules here.)
- 8-10 drops of your fave essential oil (not necessary, but makes it feel more spa-like).
Steps:
- Choose your type of oil that you will use.
- Add all ingredients into a bowl and combined.
- If your ingredients seem too dry add a little more oil.
To Use:
To get the most spa like experience, set the stage…I filled up my bathtub with warm (okay, hot) water, put a little bit of my Arbonne bath salts in the water, lit a candle, opened the window so I could hear the rain. If it hadn’t been raining a little calming music would have been great. And if it hadn’t already been midnight a glass of wine or tea would have been involved.
Soak your feet in warm water for about 10 minutes. (You could even just use this during a bath or shower.) Scrub your feet with the mixture until they feel nice and soft. I actually ended up using this all up and down my calfs too. Rinse and repeat as necessary. When your feet feel baby soft, apply your favorite moisturizer and put on your favorite pair of cozy socks. Bonus points if you sleep in these socks. Even though I HATE to sleep in socks, I did last night for the sake of my feet.
What Essential Oils should I add?!
- Peppermint/citrus for an invigorating foot scrub (if you are a nursing mom, stay away from peppermint for the time being.)
- Lavender/eucalyptus for calming
- Camomile for calming/relaxing
You can use this on your hands or even your lips! (Just don’t get it in your mouth (it won’t hurt you if you do, but the salt doesn’t taste very good)! Always apply lotion or chapstick on after.
Enjoy!!
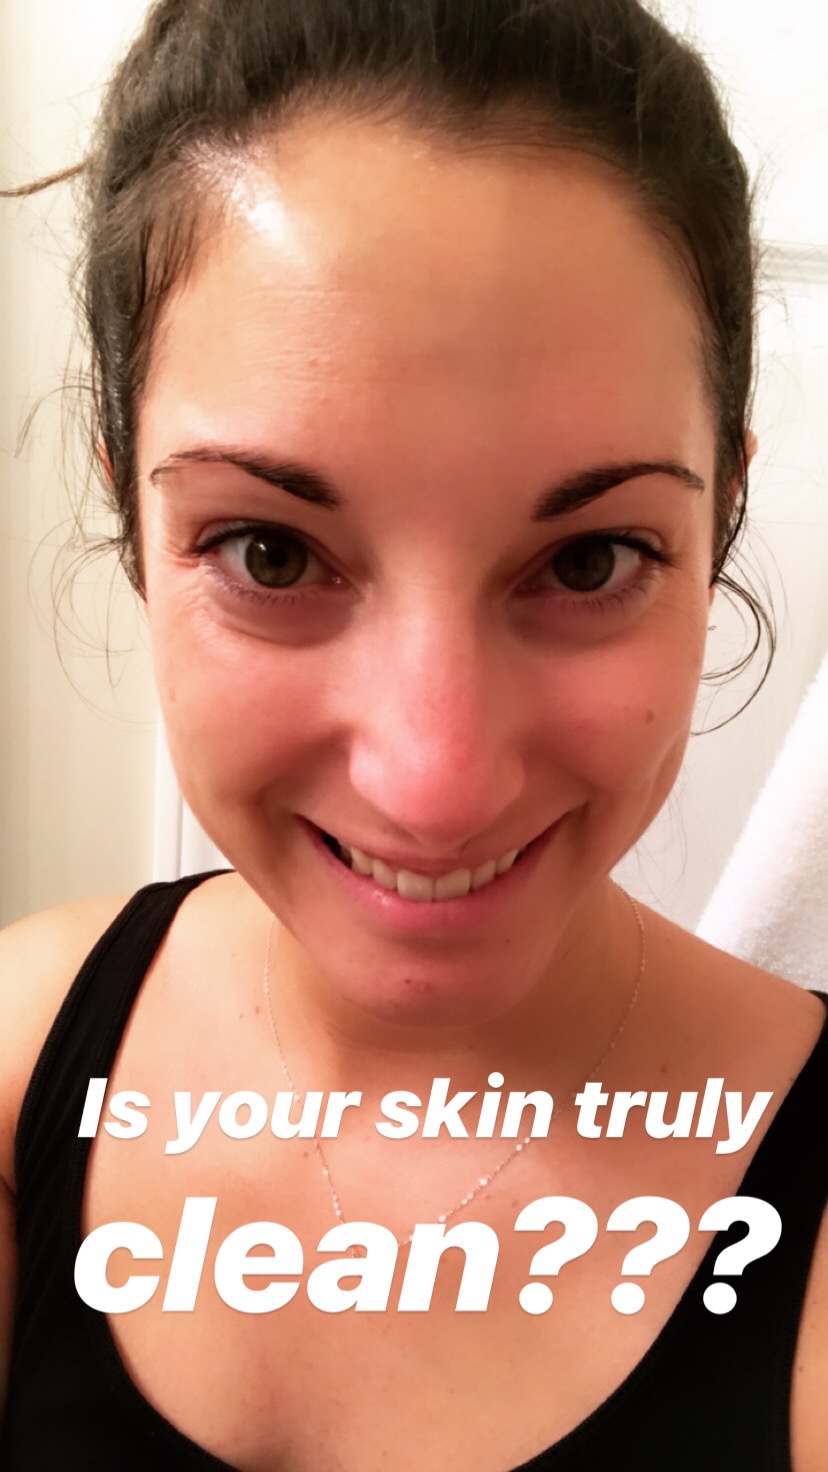
Is Your Skin Really Clean???
It’s been a minute since I have written a skincare post. My life has been extra crazy lately…its just that time of year. But then again, what time of year isn’t crazy? Now that I have gotten into my new workout and morning routine I feel like I can add blogging back into my life.
It has taken a back burner for awhile, but now I will be “making” time to blog, not “finding” time. There will be another post on that later!
Today though, I want to talk about cleaning your skin. Have you ever washed your face and then ran a cotton ball with toner on it over your face and notice that some makeup has gotten on the cotton ball? Then your face is NOT clean!
Obviously before you mask or go to bed for the night, you want to remove ALL makeup from your face so that your skin can breath or absorb all of the goodies that the mask is giving you. If you are not removing all your make-up every night, YOU SHOULD BE!
The tricky thing is that even if you are first removing your make up with either a make up remover towelette, cotton ball with oil, or simply just washing your face with your daily facial cleanser, you probably STILL have make up left over, even if you can’t see it.
To be honest, I don’t wear a ton of makeup. I wear a CC cream which like a tinted moisturizer, if I am extra tired and its showing under my eyes, I will put some concealer on, but other than that- its just a little high lighter and blush. I will say that my mascara is pretty thick so even if I don’t put a lot on, it takes more cleansing than you would think to remove it.
So, how do I make sure my make up is ALL removed? Here are my steps:
- Use a make-up remover towelette. These are my favorite!
- Wash my face.
- Run a cotton pad (I have been wanting to try these reusable/washable brand) with micellar water over my face. Depending on how much make up comes off on that pad, will either swipe a couple more pads over my face until they are clean when I wipe my face or wash my face AGAIN. (If you don’t need to wash your face again, just splash some water on your face until the oily feeling from the micellar water is gone- usually a couple of splashes.)
- When you run the cotton pad with micellar water over your skin and it comes off clear, your skin is totally clean. Trust me you will thank yourself because your skin will feel amazing!
- If your make up is being extra stubborn- pat, don’t pull, with a warm wash cloth.
- Pat dry and add your mask or moisturizer!
- Go to bed feeling squeaky clean!
7 seems like a lot of steps, but really it feels like 2-3 steps! MAKE time for you! Pretend like you are at a spa and spray some eucalyptus/lavender spray and enjoy your evening routine. You won’t regret it!
Masking 101: Where to start when you want to start masking.
Lately a lot of people have been asking where they start when they want to start masking. If this is you, start simple! Think about YOUR skin and what you want to achieve when masking.
We’ll start with skin prep for before you mask. These are some of the most important steps!
Then, I have created the chart below to use as a reference for some great starter masks and their purpose. While the descriptions are pretty self explanatory I thought I would go a little more into depth about what each mask is for and how many times a week I would suggest using them.
Here are some simple tips and tricks to remember when masking…
- After you wash your face always pat your face dry. DO NOT tug at your skin or create a pulling down effect. As one of my fave maskers always says “Gravity is NOT your friend, people!”
- After using a sheet mask, pat the remaining juice into your skin (this includes any product left in the bag it came in, you don’t want to waste any of that goodness)!
- If using a sheet mask, let it sit for about 5 minutes after the time is up to let it really soak into your skin. You can even gently pat it into your skin to help your skin soak up all the goodness.
- Don’t forget about your neck! While your sheet mask might not reach your neck, you can always pull product down *gently* to your neck after.
How do I prep my skin BEFORE I mask?
First, remove any and all make up from your face. I like to use make up remover wipes as a FIRST step. These Neutrogena Moisturizing Make up Wipes are my favorite!
Then, wash your face with your favorite face wash. I love this Mario Badescu face wash is one of my faves! Get it here or pick it up at Ulta! It’s affordable, uses clean products, is gentle, and smells amazing! What’s not to love?!
For any makeup left behind (which usually isn’t a lot, but there is usually some) I give my face and neck quick swipe with a cotton pad or ball with micellar water. It will gently take off any remaining make up, dirt, etc. left on your face from the day.
If I am trying to prolong my masking experience I will use my K-Skin Facial Steamer. It’s only $25.99 on Amazon! I literally feel like I am at a spa every time I use it! If you are using a facial steamer don’t forget to use extra moisturizer. It will keep your skin from drying out. Try to limit your use to 3 x a week max. This will also help from keeping your skin from drying out.
Now- I’m ready to mask!
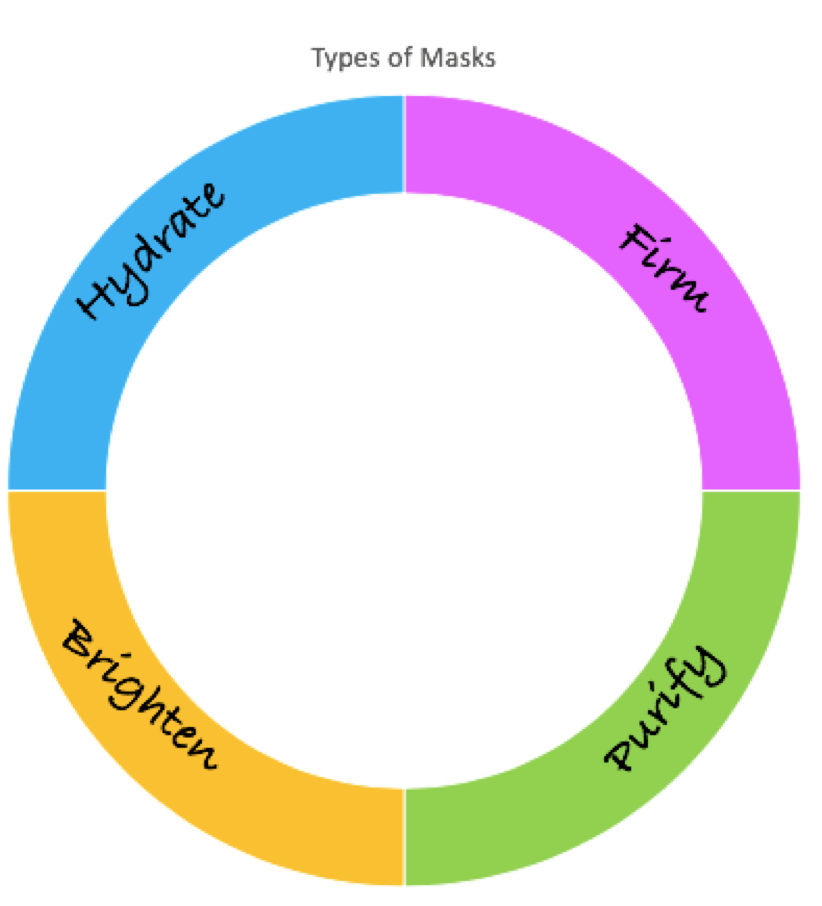
Hydrating Masks
If you are new to masking I would highly suggest starting with a hydrating sheet mask. You can pick these up literally anywhere beauty products are sold- Target, Ulta, Sephora, Beauty Brands…even a lot of boutique stores are starting to carry them! The thing I love most about hydrating masks is that you can use them in the summer, winter, spring, or fall! Skin always needs to be hydrated! You can even pat the excess that is in the pouch onto your face and neck! Let it sit for about 5 minutes and then add your moisturizer!
How Often: 3-4 times a week (could probably do more if you really wanted to! Skin always needs plenty of moisture!)
Brightening Masks
If you have been masking for awhile and are ready to branch out, brightening masks could be a great next step! Most masks I like to do at night to relax me and to allow my skin to soak up all the goodness overnight, but if I wake up and my skin just feels dull and blah (you know what I mean🧟♀️) a brightening mask is great! When you are finished with the mask, let it sit and soak into your skin. You can even pat the excess that is in the pouch onto your face and neck! Let it sit for about 5 minutes and then add your moisturizer!
How Often: as needed
Firming Masks
Huge pores? Fine lines starting to show? Grab a firming mask to smooth your skin! One of my favorites is the Egg White Mask from Skin Food. Click the link or pick it up at Ulta! It smells amazing, doesn’t take very long to do the job and the next morning when I wake up my pores are still hidden and the fine lines are toned down! Be sure to use plenty of moisturizer after! You want to firm your skin, not dry it out!
How Often: 3x’s a week at most
Purifying Masks
I love a good purifying mask! However, if you have sensitive skin you will need to beware. Purifying masks essentially bringing all the gunk that gets stuck in your pores over time to the surface of your skin to, well, purify it. This can definitely cause irritation on any skin type. Just be sure you follow the directions and do not leave the mask on for longer than the instructions say to. I always do some extra moisturizing after a purifying mask.
How many times to use per week: 1x every 1-2 weeks (depending on how sensitive your skin is)
This is the most basic information I could think of for masking! Let me know what other questions you have about masking in the comments. What else do you want to know?! If I don’t have an answer to your question, I am happy to do the research for you to find out!
Happy Masking!
The Sunday Night Trifecta
Wow! It has been a busy and amazing weekend! Friday night started with a very fun holiday staff party complete with a crazy white elephant gift exchange and ugly sweater contest, and oh yes, plenty of Mexican Food!
Saturday morning I was up early to go to a Christmas tea with my dear friends Amanda and Erin at Amanda’s church, Zionsville Fellowship. I have gone with her a few times to this even and it is always a great reminder of what Christmas is truly about. So often we forget the importance of the meaning of Christmas amidst all of the hustle and bustle that the holiday season brings.
Last night I made gingerbread dough for the first time ever. I have always heard it is so hard to make, but luckily I found a very easy recipe. Click here if you would like it!
Today I ventured down to Bloomington to bake cookies with my mom, sister, our friend Honna and her 1 yo Lyla. Its a tradition that we started many years ago with our family friend, Melissa Keller. Although Melissa is no longer with us, we plan on carry out our tradition for years to come. We made SO many Christmas cookies and other goodies that always seem to appear during the holiday season including chocolate covered pretzels and Rolo pretzels with pecans (not sure what these are actually called).
After cookie baking my family went to celebrate my birthday at one of our family favorite restaurants, Domo. Our neighbors own Domo, a hibachi grill in Bloomington. I always forget how much food they give you and I was stuffed but happy afterwards!
Needless to say, after the busy but fun weekend that I had, it is time for some skincare love.
These three topics were at the top of my list tonight! Sorry they are in the opposite order in which I used them.
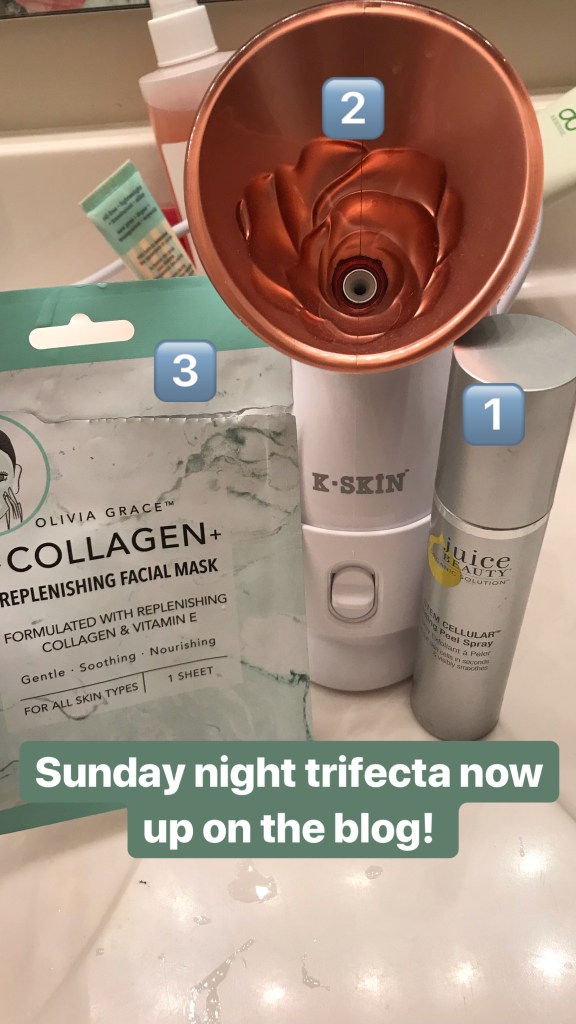
- Juice Beauty Stem Cellular Exfoliating Peel Spray
- K-Skin Facial Steamer
- Olivia Grace Collagen Replenishing Facial Mask (Bday present from my sister!)
I started out, as always taking all make up off my face via moisturizing make up remover towelette followed by micellar water and washing my face. (This is the most important step in skin care!)
Once all of my makeup was removed I steamed my face for about 3 minutes before spraying on the Juice Beauty spray. After spraying, I let it sit for about 10 seconds. Then I start rubbing it into my skin to exfoliate any dead skin. You can literally feel the skin coming off on your fingers. By the end, you are left with super smooth skin! It’s Heaven!
After rinsing off the dead skin and Juice Beauty spray, I steamed my face for about 2 more minutes. Followed by my Olivia and Grace Collagen Replenishing Facial Mask. This was a birthday gift from my sister (she knows me well!) and I couldn’t wait to try it! I just took it off about 10 minutes ago and I’m already giving it 4 stars! The smell was heavenly and it made my face even smoother! Can’t wait to see if my fine lines look smaller tomorrow morning from the collagen! I have a feeling they will!
After removing the facial mask I let the liquid soak into my skin before adding any of my moisturizer. And then, voila, bed time! 💁🏻♀️😴

Evening Skincare Routine
Ever since I was a child I have had a hard time falling asleep. Needless today, teaching kindergarten does not help the situation. For this reason, I love my evening skin care routine even more than I love my morning routine. The only thing I am rushing towards is snuggling in my cozy bed to read a good book while I let my face mask do all the work! The ultimate relaxation! My evening skincare routine has even more steps than the morning routine, but it’s all about relaxing and have a bit of “me” time before bed! Many of these steps are inspired by one of my favorite beauty/lifestyle blogger/podcaster Lauryn Evarts. Click here to watch THE youtube video that got me on this kick in the first place! She is amazingly knowledgable when it comes to skincare and I found her routine very inspiring!
My Evening Skincare Routine
- Spritz some eucalyptus spray (just a few drops of the EO in a mini glass bottle mixed with water will do the trick) to set the mood and setting of a spa. Light a candle for extra effect!
- Remove make up using Neutrogena Make Up Remover Wipes
- Remove the rest of my make-up with a cotton ball or pad with micellar water. Keep going until the pad wipes totally clean.
- Wash my face with Mario Bedescu Enzyme Clensing Gel
- If I am using my steamer, I will use it for about 5 minutes before putting on my mask.
After you wash your face and make sure all make up is removed, its time for the fun stuff! If I am feeling extra stressed I use my K-Skin Facial Steamer. It will make you feel like you are at the spa! It is very tempting to use it every day but be careful- it will dry your skin out if you use it too much! So I only use it 3 times a week at most!
- If my pores are feeling huge I use my Egg White pore mask by Skin Food.
- If my skin is feeling dehydrated, a hydrating sheet mask is at the top of my list! You can’t go wrong with a sheet mask.
- If my skin needs a good old fashion detox I use either my Doterra Mud Mask or my Arbonne Renew and Rescue mask.
If you are new to masking, but want to start masking regularly, I suggest going to Target or Ulta and getting a couple of sheet masks. The price is right and it is so much fun to play around with different masks to see what your favorites/needs are! If masking overwhelms you, let me know and I am happy to help you get started slowly!
I like to choose masks that you leave on for at least 15-20 minutes. The longer the better! Even though I would love to leave my masks on for an hour, it is important to not leave your mask on for longer than the directions state. Doing so could be counterintuitive, causing your skin to dry out or become irritated.
After my mask has been removed, I continue on with my routine. I currently switch every other night between these two products:
- Mario Bedescu Vitamin C Serum
- Arbonne Facial Genius Nightly Resurfacing Pads
Both of these products were splurages, but I got the Vitamin C Serum on sale at Ulta and I basically got the resurfacing pads free with an order I placed! Win!
After letting the product sit for about 30-60 seconds I put on my moisturizer. Right now I am using the Arbonne RE9 Night Repair Cream. I LOVE the nights that I use the resurfacing pads + the RE9 Night Repair Cream. My skin is SO soft!
After moisturizing, I usually add an oil on top of my moisturizer! Funny fact about putting oil on your face- many people think that oil will clog your pores. If its coconut oil, it might. But facial oil is actually really great for your skin! It will make your skin glow and keep your skin hydrated-especially throughout the night! If you want to try it out- try this Jojoba Oil from Trader Joes! It’s extremely affordable and a little goes a long way so it lasts forever!
After this, I’m ready to hit the hay! Relaxed, knowing I got a bit of “me” time in helps tremendously to calm my nerves from the day or any feelings of anxiousness that I have about the following day!
Let me know if you have any questions! I would be happy to answer them the best that I can! I hope I got you excited about your skincare routine! I’ll let you know periodically when I switch up my products but my current rule is- no buying new products if I still have products to use up! That goes for skin and hair products!
XO- Sadie
Morning Skincare Routine
Lately I have had dreams of waking up very early with plenty of time for some “me-time”. But to be honest, I love my sleep and I NEED sleep! My parents would tell you I have never been a morning person. Ever. So dreams of morning yoga, meditation, or reading a good book are always put back to sleep when my alarm goes off at 6:45am. I needed something that was meant just for ME and perfect for MY personal morning routine. When it came down to it, a solid skincare routine was the way I wanted to spend my morning. Simple, yet important.
To put it simply, I am a skincare fein. I love trying new products and switching up my routine with the latest and greatest. Don’t forget, I am a teacher, so my obsession requires items to be teacher-budget friendly while being a great and healthy product for my skin.
In the past couple of years I have really made a point to try more products that are clean and free of products I can’t pronounce. Upon turning 30 I decided to make skincare a priority. With a job that is stressful more often than not, I thought it best to make it a point to take care of my skin every morning and every night! Until a year ago, I was running around every morning with the following routine-
- hit snooze at least 5 times.
- get coffee
- throw on make up
- put some dry shampoo in my hair
- rush out the door to work
Now, my mornings look a little different. I take a little more time for myself in the morning to set the stage for the day. These are the current products that I am using.
- hit my snooze 3 times (hey, when it’s dark out waking up is even harder but I am trying to be better!)
- wash my face with $14- Mario Badescu Enzyme Cleansing Gel
- spritz my face with $7- Mario Badescu Facial Spray with Aloe, Herbs, and Rosewater
- 1 pump of facial serum- $48, This is a splurge, but I love Beauty Counter’s Facial Serum! Get it here!
- Moisturize with$22- Clinque Facial Gel
- 5 minute facial massage, you can use your hands, or if you own a Clarisonic, you can purchase a facial massager attachment. It makes it much easier! (If you are more interested in facial massage check out this video from one of my favorite beauty/lifestyle bloggers!
- Finally, I apply my foundation. I am a huge fan of IT! CC Cream ($38). It has a whopping 50+ SPF, and it makes you feel like you are wearing full coverage make-up without the weight of foundation/powder. It just feels like your skin! If you want a dewy glow try the Illumination line! Your skin will glow, but will not be glittery! *Swoon*
- Coffee!
- Finish the rest of my make-up/hair for the day.
- 2- 3x’s a week, Exfoliate! Try this one! $26
Another tool I love, that is pretty popular right now is my jade roller! I recommend keeping it your fridge or freezer. It feels SO refreshing and it will help combat any morning inflammation you might have. A quick roll with your jade roller and facial massage with your hands or Clarisonic attachment will help get your circulation going in your face and really tightens your skin and helps smooth out fine lines! Another trick I use to make sure I get the most out of all of my products is to wait 30-60 seconds before I layer on the next product.
This may seem like a lot of steps, but trust me- once you get into a routine you love, it will seem like its only 3 steps! Do you have any favorite morning routines or skincare routines? I would love to hear them! Comment below!
