Roasted Sweet Potatoes & Kale Salad with Dried Cherries, Feta & Pepitas

Well, my Christmas tree is up and Christmas Vacation is playing on the TV! It’s finally December and I am finally able to get in the Christmas Spirit!

I always get a lot of questions at lunch about what I am eating and where I got the recipe from! More often than not, my answer is simply, Skinny Taste Blog! I am obsessed! Gina Homolka is the creator of the blog and all the recipes. While I can’t take credit for any of her recipes, I will post my favorites and any changes that I have made to them!

One reason I love Gina’s blog is because she posts weekly meal plans with ideas for breakfast, lunch, and dinner! In addition to that she has a grocery list all ready to go! And the best part? It’s FREE!!! I typically choose 2-3 recipes from her blog for the week.

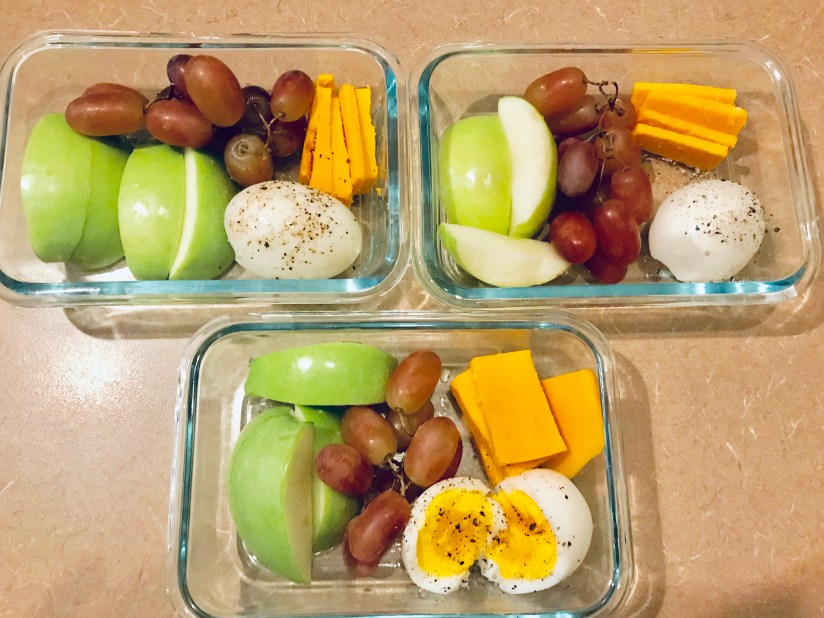
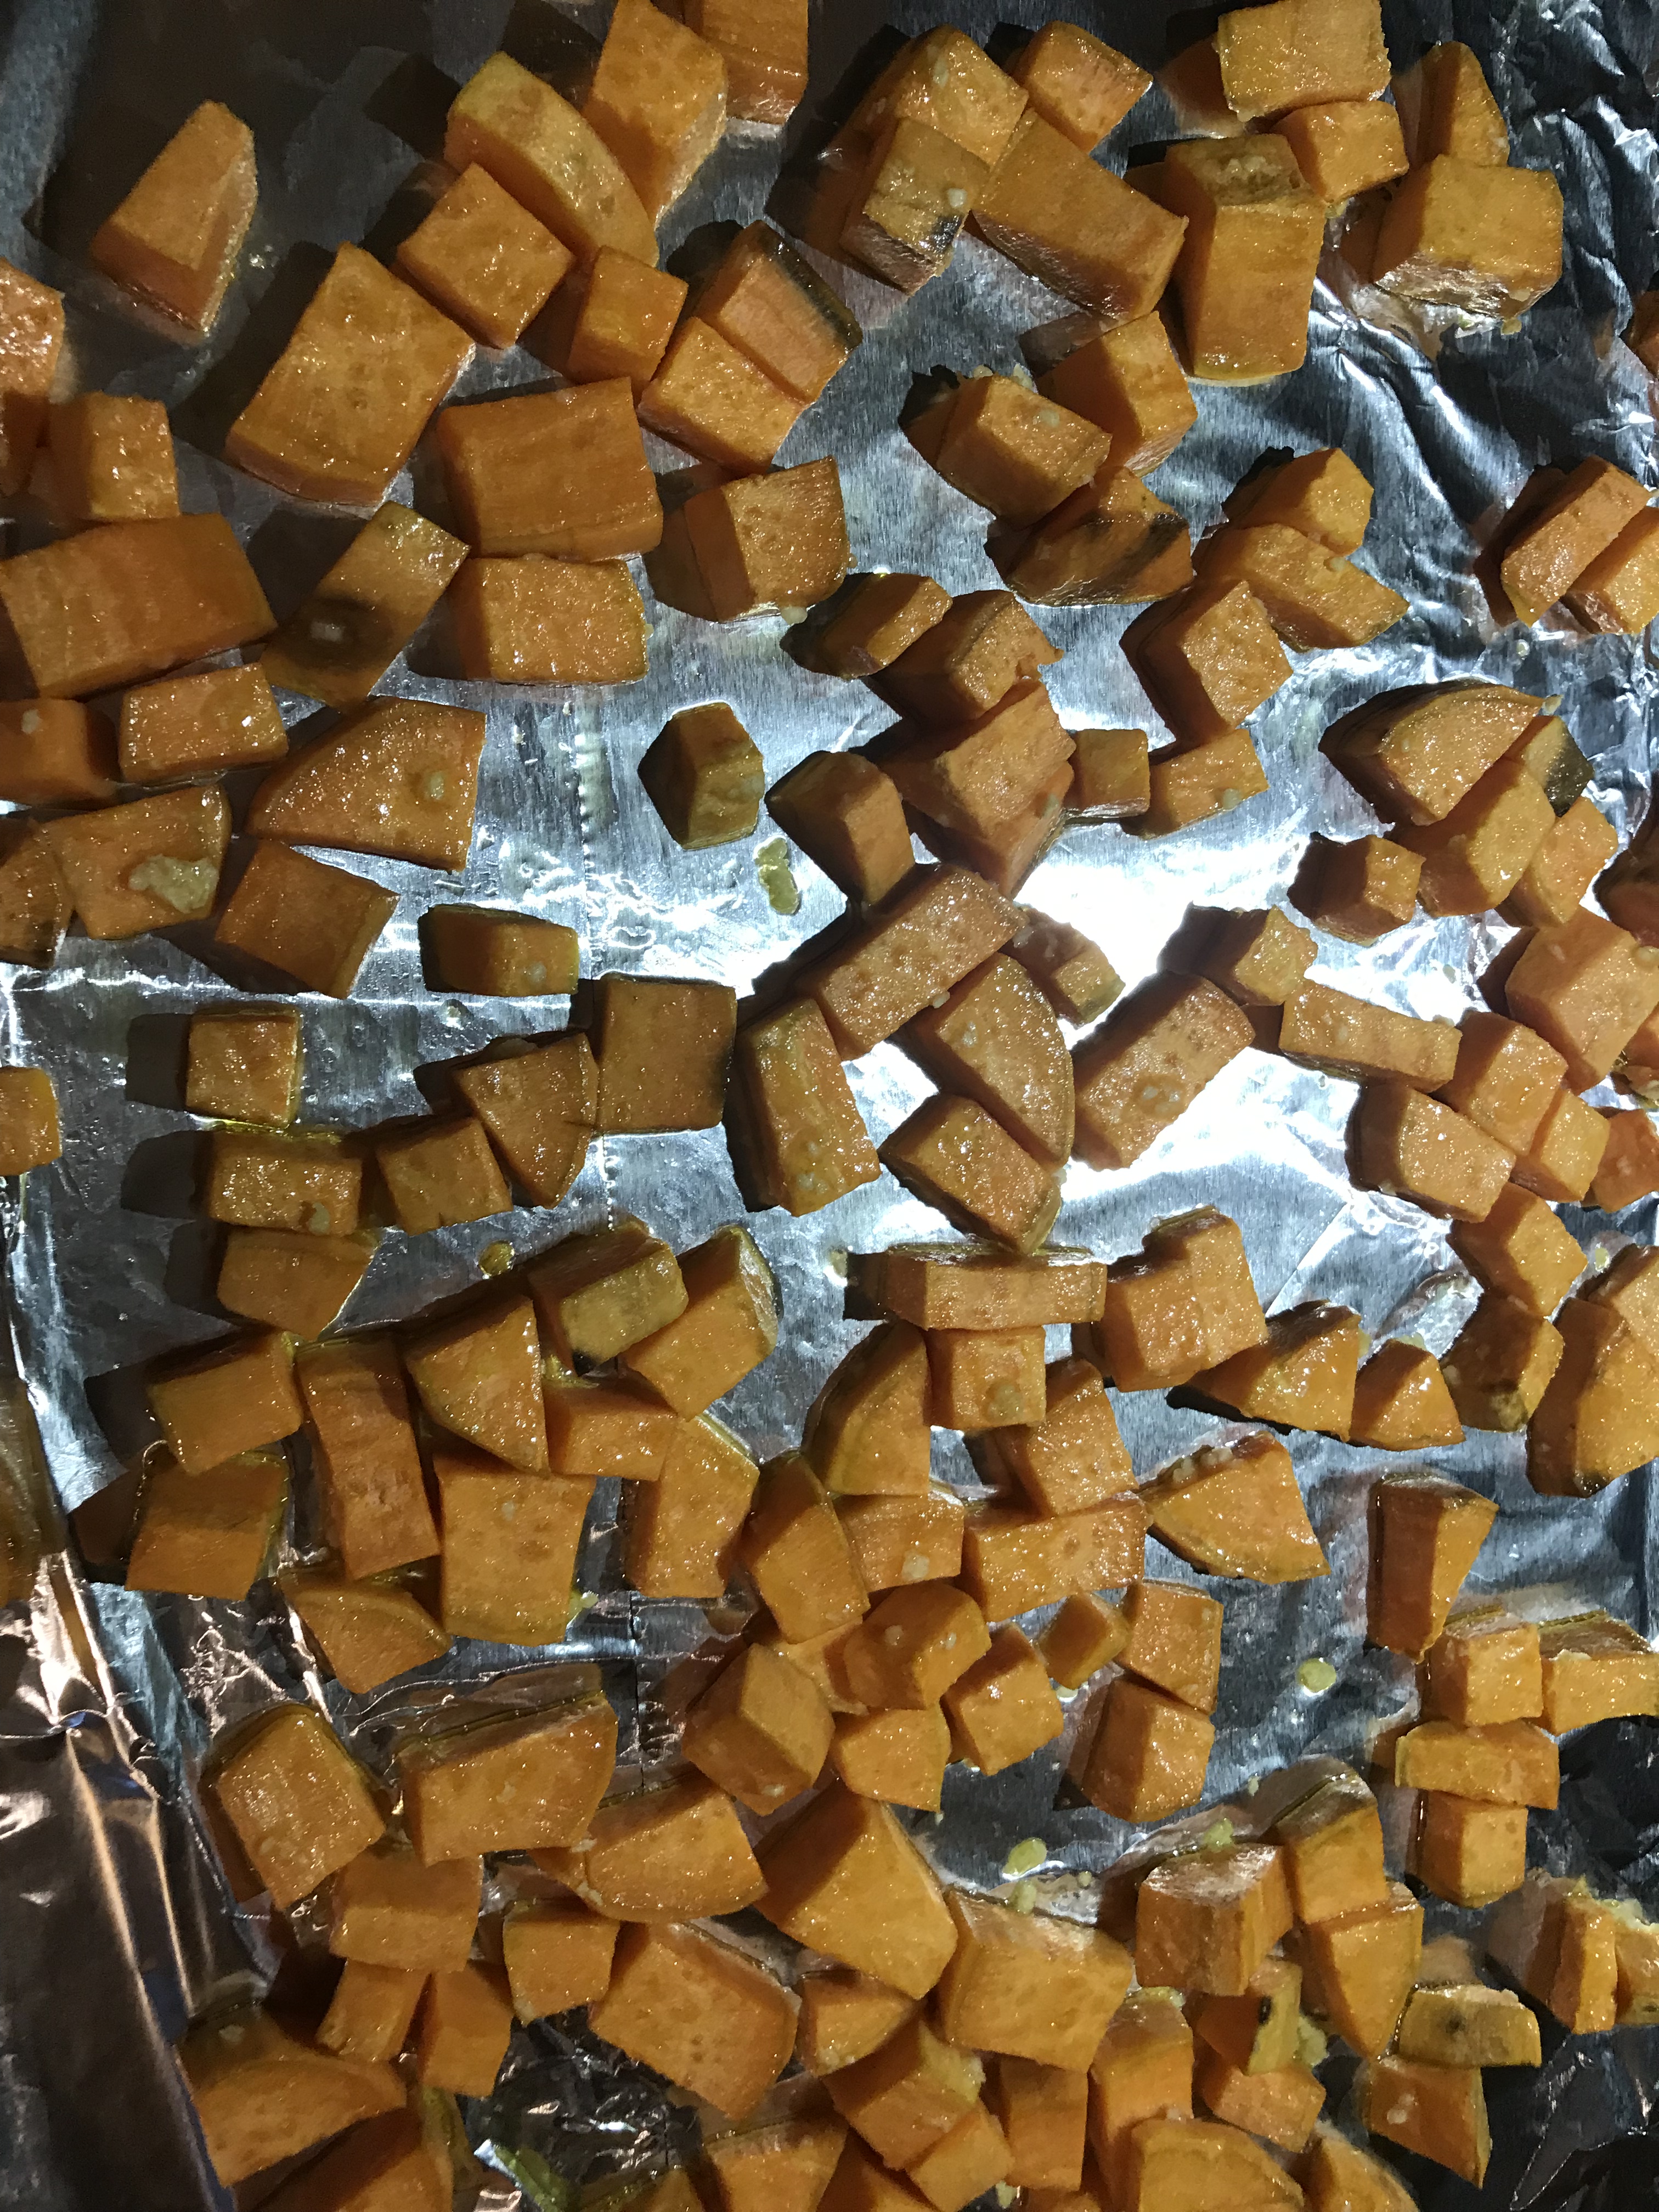
I have also been trying to be better at meal prep. Some weeks it goes better than others. I have been eating  out less which is a plus! A couple of weeks ago Skinny Taste had posted a Kale Salad with Roasted Sweet Potatoes, Feta, and Pepitas. Normally I am not a sweet potato person. But I love every other ingredient in the salad so I thought it was worth a shot. I could have left out the sweet potato, but I normally don’t like to change up a recipe before I try it at least once.

img_4428

I stopped by Trader Joe’s earlier and got a couple of bags of pre cut kale. You still have to go through at tear the stems off, but the pre cut bags at least save you one step!

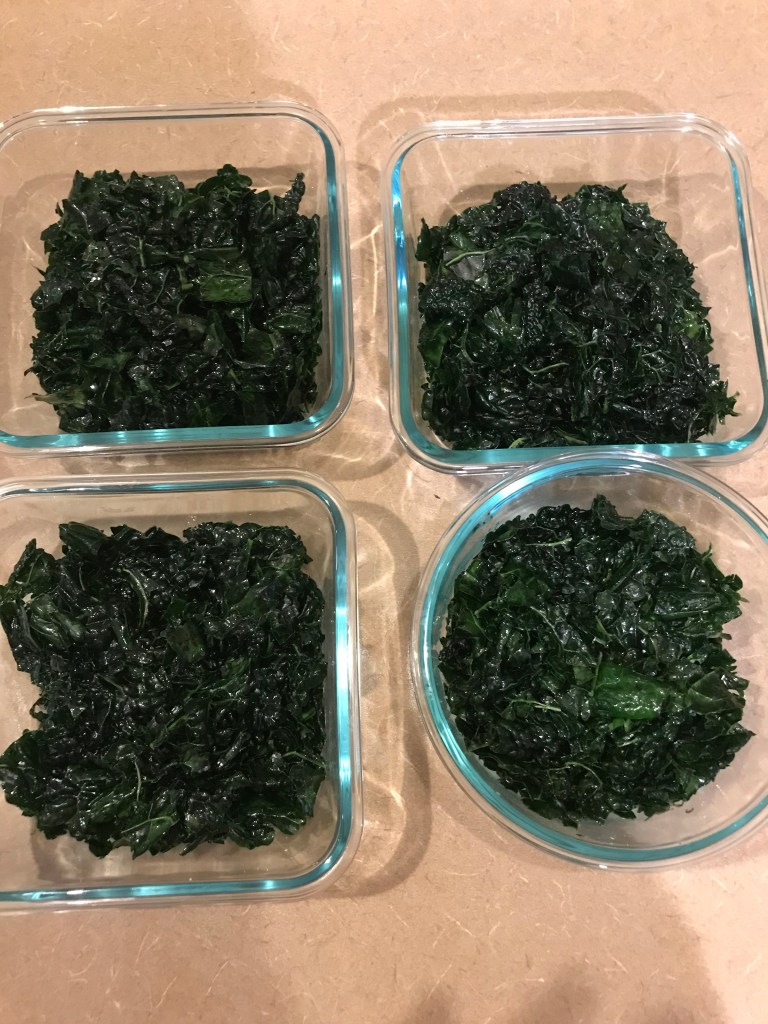
After you have removed all of the stems drizzle a tablespoon of olive oil over the kale, more if needed.  Massage the kale for about 3 minutes. You will feel the kale start to become more tender. This will help the flavor to be much less bitter. (Thanks, Hillary for that awesome tip! It made me fall in love with Kale! Now if I could just get Scott to eat it…)

The great thing about kale is that you can massage it ahead of time and use it all week! Just divide it up into smaller containers! I got mine at Costco!

I’ll add the feta, dried cherries, and pepitas the morning of and the dressing right before!

The dressing calls for fresh orange juice or lemon juice. I doubled the recipe so that I could eat it all week. So for the dressing I used juice from 2 oranges and 1 1/2 lemons.

To make this salad for lunch or dinner click here!

If you try this recipe I would love to hear about it! Make any changes? Likes or dislikes about the recipe? Let me know! Comment below

DIY Starbuck Protein Box

  • I know I just had this on the blog a couple of posts ago, but it’s THAT good!! And so easy to prep! I don’t mind eating the same thing from breakfast throughout the work week but if you feel differently here are some other ideas for protein boxes:
    • Cutie Oranges or clementines
    • Nut butter
    • Hummus
    • Nut crackers
    • Berries
    • Mixed nuts
    • Celery
    • Carrots
    • Lox
    • Kale chips
    • Peppers
    • Granola
    • Pita bread or chips
    • apples (brushed with lemon juice)

    As you can see, the possibilities are endless. Protein boxes would also be great as a lunch and are perfect as a healthy snack! Let me know your ideas for protein boxes!

    Green Beans & Rice

    Do you like green beans, tomatoes, beef, and rice?! Then you will love Green Beans and Rice. Growing up this was always one of my favorite meals. It was the meal I always asked for on my birthday and it continues to still be a comfort meal to this day. Left overs are even better the next day! This recipe does make a lot, so throw some in the freezer to enjoy later this winter!

    For the Beef:

    • 1 lb stew beef
    • 1 med. onion
    • 2 TBS butter
    • 2 lbs fresh green beans (I like to use the bagged green beans from Trader Joe’s.)
    • 1 28 oz can crushed tomatoes
    • 1 28 oz can diced tomatoes
    • Salt and Pepper

    For the Rice:

    • 1/4 cup butter
    • 1/2 C orzo
    • 2 C rice
    • 4 C hot water

    Dice the onion and sautee beef and onion together until the beef has been browned. Add salt and pepper to your liking. Add the green beans and cover for 15 to allow the beans to steam. After 15 minutes add the tomatoes. Cover and simmer for 1 hour.

    To make the rice, first brown the orzo with the melted butter. When the orzo is golden brown add the rice and stir until the mixture is sticky. Then, add the water and bring to a roaring boil for about 2-3 minutes. Then, cover and simmer until the rice and orzo mixture has finished cooking.

    That’s it! To enjoy, top the green beans and tomato with rice!

    Are you a hummus fiend like me???

    If so, you should try making your own hummus! It’s super simple to customize, can be made in less than 15 minutes and tastes way better than store bought! You can use a food processor or a blender (my ninja works great). I love using my mini food processor though! You can also make homemade tahini sauce- it’s super simple! I will post the recipe that I have used before later!

    For an original hummus recipe, use the ingredients pictured above. You can always add in more like roasted red pepper or avocado, but these are the key ingredients I always start with.

    Ingredients

    • 1 (15 oz can) of chick peas
    • 1 clove minced garlic (any size, depending on how much you like garlic)
    • 1/4 cup of fresh squeezed lemon juice (about 1 large lemon) or more if you love lemon like me πŸ‹πŸ’›
    • 1/4 cup of well stirred tahini
    • 2 tbsp of extra virgin olive oil (plus a little more for serving)
    • 2 tbsp of water
    • 1/2 tsp cumin
    • 1/2 tsp salt
    • Paprika
    1. Drain and rinse chick peas in a colander and set aside.

    2. Add lemon and tahini to food processor and process for 30 seconds. Scrape down the sides and process for another 30 seconds. This will whip the tahini and lemon juice to make it soft and creamy!

    3. Add minced garlic, salt, cumin, olive oil and process for 30 seconds. Scrape down sides and process for 30 more seconds.

    4. Add 1/2 of the chickpeas and process for 1 minute. Scrape down the sides of the bowl and add the remaining chickpeas and process for 1-2 minutes. If your hummus seems extra thick SLOWLY add a little water while processing.

    I have been making hummus for the past few years and this has never happened untiled the last time I made it. I got too excited and added too much water too fast and my hummus became more of a thick, soupy consistency. 😩 This had never happened before, so just be careful and you will do great!

    5. At this point you can add any fun additional ingredients that you want to use to customize your hummus! Or you can just use the above recipe if you like classic hummus! After I put my hummus into the container I like to drizzle with a little more olive oil and add a dash of paprika! It will last up to 1 week in your refrigerator- if you don’t eat it all in one sitting, which is usually what happens to me!

    Here are some other fun ingredients that you can add to your hummus to make it your very own!

    • avocado
    • spinach and artichoke
    • roasted red pepper
    • black beans (instead of chick peas) with lime and cumin
    • lime instead of lemon
    • cilantro/jalapeno
    • hatch green chili (for spicy hummus)
    • caramelized onion
    • beets (if that your jam! fun fact- beets are one of the only foods I hate! Completely taste like dirt to me, so if you like dirt hummus give it try!😜)

    Mojo Chicken Tacos

    This chicken taco recipe is full of citrus so of course, I’m obsessed. Surprisingly though, there is no lemon in this recipe! It is packed with a ton of flavor and its Whole 30 compliant. Although I could never do Whole 30, I like knowing that this recipe is compliant because it makes me feel healthier! 😜

    I made the chicken in my Instapot, frozen, and it cooked in 20 minutes!!! When I went to go shred it, literally just fell apart, in a good way! If you want the Instapot version just let me know and I will get those steps for you! I will point out that you don’t need an Instapot to cook the chicken. You can just as easily bake it in the oven and then shred it. You won’t add the sauce until after it has been shredded.

    Ingredients

    • 4 Chicken Breasts, boneless and skinless

    For the Mojo Sauce:

    • 1/4 cup extra virgin olive oil
    • 2/3 cup fresh squeezed lime juice
    • 2/3 cup orange juice (I just used OJ, not fresh squeezed)
    • 8 cloves of garlic, minced
    • 1 tbsp grated orange peel
    • 1 tbsp dried oregano
    • 2 tsp ground cumin
    • 2 tsp kosher salt
    • 1/4 tsp ground pepper (I used about 1/2 a tsp maybe a little less)
    • 1/4 cup chopped fresh cilantro plus more for garnish
    1. Bake chicken breasts at 350 degrees from 25 to 30 minutes or until cooked through (depending on how large your chicken breasts are).
    2. While cooking the chicken put all the ingredients for the mojo sauce in a bowl and whisk together.
    3. When chicken is finished baking transfer to a plate and shred.
    4. Put chicken in a bowl and combine with mojo sauce.
    5. Broil on low until the chicken becomes slightly browned or crispy.
    6. Remove from oven and mix.
    7. Put into tacos or eat all by itself!

    Cilantro Chicken Salad

    Lately I have been opting for the easiest and healthiest, yet tastiest lunches that I can make! Chickpea Greek Salad, Kale salad with roasted sweet potatoes, and mojo chicken just to name a few. These are some of my faves, I was craving something new! Insert, cilantro chicken salad. It has just the right amount of spice to make it taste like a slightly Mexican dish, while still having the lightness of chicken salad! Here is the recipe!

    7 oz shredded chicken breast (I used rotisserie) 2T Mayo (light if you want) Kosher Salt & Fresh Black pepper (to taste) 1/8 tsp Garlic Powder 1/8 tsp Chili Powder 1/8 tsp Ground Cumin Juice of 2 limes (about 2oz) 2T fresh chopped cilantro Chicken stock if chicken is too dry.

    Mix all ingredient together and portion out into meal prep dishes! This can be enjoyed over greens, with crackers (my choice for lunch today), on a sandwich, or by itself! I also cut up some Compari tomatoes to serve with it. Very tasty and filling! Enjoy!

    Simple, Delicious, AND Healthy?!

    Italian Ground Turkey and Veggie of Choice

    Something I have been eating A TON of lately is ground turkey. Before when I thought of ground turkey I thought of a tasteless meat. However, I was so wrong! Just add your favorite seasoning and some salt and pepper and you’ll have a very tasty meal!

    Literally I just browned the turkey over medium high heat, adding the salt, pepper, and Italian seasoning as it cooked.

    I had some left over brussle sprouts this week in the fridge that needed to be used up so I roasted those with some salt, pepper, and garlic powder for about 20 minutes at 400 degrees in the oven. They were a tasty addition to my turkey.

    You could do this combo with your favorite veggie! Some of my favorites to roast and enjoy with my Italian turkey are…

    1. spaghetti squash (add some parmesan cheese and you’re in for a real treat!)
    2. sweet potatoes
    3. brussel sprouts
    4. asparagus
    5. green beans

    Just add a cup of berries and you will have a tasty healthy meal ready to go in such a short amount of time!

    I love buying the organic turkey from Costco. It’s typically about $14 for 3 packs, but hey- in the long run, eating organic is better for you anyway right?! So my justification is my long term health. In fact, I always get my o

    Chicken Tortilla Soup in the Instapot …or Stovetop!

    Has it seriously been 5 months since I wrote my last cooking blog post?! This school year has been the hardest I have had in 4 years. I am completely exhausted every night and sometimes I find myself asleep before 9pm which is totally unlike me! The good news is, we have made it to Fall Break and I have plenty of time to write more blog posts!

    Today for whatever reason, maybe (well, definitely) it’s because it finally feels like fall I felt like making chicken tortilla soup. I even got a whiff of the fall “smell” today! You know the one, like dead leaves?! Yahoo!

    Last week I was more sick than I have been in years! I mean I have gotten strep throat 2 years in a row, but this bad cold ended in a sinus infection! I’m blaming the fact that not only do we have parent teacher conferences (which I don’t mind AT ALL, I actually love them) but we also have a staff meeting AND PD Meetings AND PLCs. And everyone is wondering why all the teachers are getting sick in October…….just saying…don’t you think they should cool it with the meetings during Parent Teacher Conference month? Especially since we have to schedule Parent Teacher Conference on our own time and are not given time to actually do them?! Okay I’m sorry for my rant, on to the most delicious chicken tortilla soup I have EVER made!

    If you have an Instapot, use that, but if not you can totally make it on the stovetop too. I love my Instapot because I am notoriously known to forget to take meat out of the fridge until I’m actually ready to use it. One awesome thing about the Instapot is that it will cook frozen chicken in just 10 minutes under high pressure! Score!

    I adapted this recipe from the amazing food blog DamnDelicious. You can click this link and go directly to her website to find the original recipe if you would rather try that. I just changed/added a few things. It’s seriously SO good! I have never put tomato paste in my chicken tortilla soup, but it really helped to thicken it up! And one thing I always add is black beans! Gotta have that fiber…

    Ingredients

    • 2 tablespoons olive oil
    • 1/2 of a sweet onion, diced
    • 1 poblano pepper , seeded and diced
    • 3 cloves minced garlic
    • 4 oz tomato paste
    • 1 Tablespoon chili powder
    • 1 1/2 teaspoons cumin
    • 1 teaspoon dried oregano
    • 2, 14.5 oz cans diced tomatoes with green chilis
    • 1, 14.5 can black beans, rinsed and drained
    • 1.5 lbs boneless skinless chicken breasts
    • 4 cups chicken stock
    • Kosher salt and freshly ground black pepper to taste
    • 1/2 cup cilantro

    *My Favorite Toppings*

    • avocado sliced or cubed
    • cheese (I like Mexican cheese best)
    • sour cream
    • squirt of lime juice
    • tortilla chips

    Directions

    1. Heat olive oil (If using IP put sautΓ© setting on high (or heat large pot over medium/high heat)) and sautΓ© pepper and onion until golden brown or soft.

    2. Add cumin, oregano, chili powder, garlic, tomato paste and cook for about 1 minute or until fragrant.

    3. Add tomatoes and chicken stock. Stir, making sure to get all the brown bits off the bottom.

    4. Add the raw chicken. If using an IP pressure cook on high for 10 minutes. (My chicken was still a little frozen, so I cooked it for 13 minutes and it was perfect.) If cooking over the stove, will probably need to cook for 30 minutes medium high heat to make sure the chicken is cooked through.

    5. After pressure in IP has been released, remove chicken and shred. Add it back into the soup and add chopped cilantro, season with salt and pepper to taste. Add your favorite toppings and enjoy!!

    How to Make the Perfect Avocado Toast!

    The thing with avocado toast is that there are endless possibilities. There are million ways to make it, but the best avocado toast is simple. Think about fresh ingredients that you enjoy.

    Basically you will start with 3 main ingredients…

    1. Toast (I love to use a thicker grainer bread like Dave’s Killer Bread.)
    2. Avocado (I like to keep it somewhat chunky so I mash it but leave some bigger pieces)
    3. Eggs (anyway you like, my favorite is over easy. I know a lot of people like to use scrambled though. Poached would be great too! OR omit the egg altogether!)

    Directions

    1. Cook your eggs your way while you mash the avocado. I like to add a bit of lime (or lemon) juice and some pink Himalayan salt to give it more of a guac taste!
    2. Toast your bread when eggs are almost finished.
    3. I like to put my favorite butter (Sea Salt and Olive Oil from Land O’ Lakes- in a tub with a blue lid at the grocery) on my toast.
    4. Then layer with avocado and egg. Add a salt and pepper to taste. And Ta-da Avocado Toast is ready to eat!
    5. You could try to eat this like normal toast but I have found the best way to eat it with a fork/knife.

    Now, remember when I said there are a million ways to make avocado toast? Here are some other ideas that you could add to your toast to make it even more delicious!

    • arugula (or other green such as spinach)
    • pickled onion
    • Trader Joe’s “Everything but the Bagel” seasoning
    • lemon
    • sliced tomato
    • smoked salmon
    • bacon bits or strips of bacon
    • your favorite cheese
    • red pepper flakes

    What do you put on YOUR avocado toast?!

    Roasted Cauliflower, Orzo and Feta Salad

    This has been my lunch all week! OMG! SO Good! If you you love lemon, feta, and garlic, you will love this salad! Even if you are not a fan of cauliflower, it has so much garlicy goodness that the roasted cauliflower tastes more like garlic. This recipe is adapted from Chrissy Teagan’s “Cravings” cookbook. One thing I love about it is that you can adapt it so many different ways!

    For the Cauliflower/Orzo…

    Ingredients

    • 1 small head of cauliflower
    • 4 tablespoons of olive oil
    • 3 cloves of garlic
    • 1 tsp kosher salt
    • 1/2 tsp freshly ground black pepper
    • 1 cup orzo

    Preheat the oven to 400 degrees

    1. In a bowl toss the cauliflower with 3 tablespoons of olive oil, garlic, salt/pepper
    2. Spread cauliflower on a baking sheet (pro tip- be sure when roasting veggies they are in a single layer, otherwise the veggies will steam instead of roasting)
    3. Roast for 20 to 25 minutes, until the edges are crisp
    4. Let cool and set aside

    To Make the Orzo

    1. In a pot of salted and boiling water, cook the orzo according to directions. However, boil 1 to 2 minutes less than the package says.
    2. Immediately drain in a colander, rinse with cold water, and pour 1 tablespoon of olive oil on orzo (while still in colander).

    For the Dressing

    Ingredients

    • 3 tablespoons extra virgin olive oil
    • 3 tablespoons fresh lemon juice
    • 1 tsp honey
    • 1 tsp dijon mustard
    • 1/2 tsp kosher salt, plus more to taste
    • 1/2 tsp freshly ground black pepper
    • 1/4 cup thinly sliced red pepper (I omitted this and it was still delicious!)
    • 1 cup (or more) crumbled feta cheese
    • 2/3 cup dried cherries
    • 4 cups baby spinach

    To make dressing…

    1. Mix together olive oil, fresh lemon juice, honey, dijon mustard, salt/pepper
    2. In a large bowl add dressing, cauliflower, onions (if that’s your thing), feta cheese, dried cherries
    3. Serve on a bed of baby lettuce

    Other ways to tweak this recipe…

    1. serve on a bed of kale or arugula
    2. Try different dried fruits…cranberries would be good! I bet even adding some fresh fruit would be tasty!
    3. Sans onion (obvi)
    4. If you decide to meal prep this for the week, put your greens in one container and your orzo/cauliflower mixture in another.